Categories
Tags
-
#Image & Video FullScreen Background WordPress Plugin: A Developer's Deep Dive & Technical Review Creating an immersive first impression on a website often comes down to visuals. While clean
#minimalist designs have their place
#sometimes you need to hit the user with a full-blast
#edge-to-edge visual statement. This is where full-screen backgrounds come into play. They can set a mood
#showcase a product
#or create a cinematic experience that static layouts simply can't match. The challenge
#however
#has always been implementation. Wrestling with CSS
#ensuring responsiveness
#and fighting theme conflicts can turn a simple design idea into a development nightmare. This is the problem the Image&Video FullScreen Background WordPress Plugin aims to solve. In this technical review and guide
#Building an e-commerce website for a highly specialized and regulated industry like firearms is not for the faint of heart. You're not just selling t-shirts; you're dealing with complex product specifications
#a discerning customer base that values precision
#and the constant need to project an image of professionalism and trust. Into this challenging space steps the Range - Weapon Shop & Gun Store WordPress Theme
#a product that aims to be a turnkey solution for online gun stores
#shooting ranges
#and tactical gear suppliers. But in a world of multipurpose themes
#does a niche-specific tool like this actually hit the target
#or does it misfire under the pressure of real-world development? As a developer who has navigated the murky waters of niche e-commerce
#I'm putting Range through its paces to see if it’s a precision instrument or just a generic template in tactical camouflage. First Impressions: Aesthetics and Demo Analysis Loading up the demo for the first time
#Range immediately establishes its intended atmosphere. The design language is unapologetically masculine and rugged
Archives
A Developer's Deep Dive: BWD Image Hover Effect Addon for Eleme
-
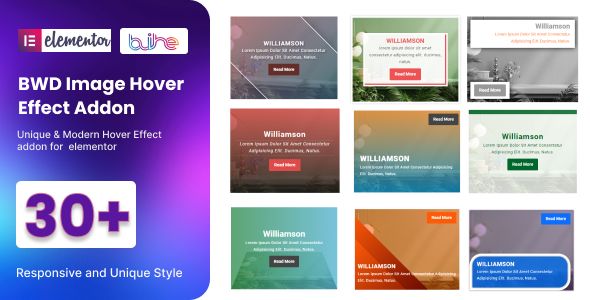
A Developer's Deep Dive: BWD Image Hover Effect Addon for Elementor Review
Static images on a webpage are a missed opportunity. In an environment where user engagement is the ultimate currency, every pixel should work to capture and hold attention. While Elementor provides a robust foundation for page building, its native image widgets offer only basic hover functionalities. This often forces developers down the path of writing custom CSS, a solution that grants ultimate control but costs time and complicates client handoffs. This is the gap that third-party plugins aim to fill. Today, we're putting one such tool under the microscope: the BWD Image Hover Effect addon for elementor. It promises a vast library of pre-designed, eye-catching effects with minimal effort. But does it deliver on that promise without bogging down your site or boxing you into a stylistic corner? Let's find out.
The Core Problem: Bridging the Gap Between Simplicity and Spectacle
Before we dissect the plugin itself, it's crucial to understand the context. Image hover effects are more than just decoration; they are a fundamental form of micro-interaction. They serve several key UX purposes:
- Feedback: A visual change on hover confirms to the user that an element is interactive and clickable.
- Information Scent: Effects can progressively reveal information, like a project title or a short description, keeping the initial UI clean and uncluttered.
- Aesthetic Enhancement: Let's be honest, smooth, creative animations simply look good. They contribute to a perception of quality and professionalism.
Elementor's native Image and Image Box widgets allow for basic opacity changes, CSS filters, and transition durations on hover. You can make an image grow slightly or fade to a different color. It's functional, but it's not going to win any design awards. To create more complex effects—like sliding overlays, 3D flips, or revealing text with sophisticated transitions—you'd typically need to write custom CSS. This involves targeting the right selectors, writing `::before` and `::after` pseudo-elements, defining `transform` properties, and managing `transition` timing. It's perfectly doable for an experienced developer, but it's a workflow bottleneck, especially when building out a large gallery or team page.
The BWD Image Hover Effect addon positions itself as the solution, offering a massive library of presets that can be dropped into any Elementor page. The value proposition is clear: save development time while providing clients with a visually rich experience. Our job is to determine if the execution matches the ambition.
Installation and First Impressions
Getting the plugin up and running is straightforward, particularly if you're sourcing it from a GPL repository like gpldock. The GPL license offers the freedom to use the plugin on unlimited sites, which is a significant advantage for agencies and freelancers managing multiple client projects. The process follows the standard WordPress plugin installation procedure.
Step-by-Step Installation:
- Once you've acquired the plugin, you'll have a
.zipfile (e.g.,bwd-image-hover-effect-pro.zip). - Navigate to your WordPress Dashboard.
- Go to Plugins → Add New from the left-hand menu.
- Click the Upload Plugin button at the top of the page.
- Choose the
.zipfile you downloaded and click Install Now. - After WordPress unpacks and installs the plugin, click the Activate Plugin button.
With the plugin activated, there are no global settings pages to configure. The functionality is entirely self-contained within the Elementor editor. Create a new page or edit an existing one with Elementor. In the widgets panel on the left, a new section named "BWD Effects" should now be visible. If it's not immediately apparent, you can use the search bar and type "Image Hover." You'll find the "Image Hover Effect" widget ready to be dragged onto your canvas.
My first impression of the widget's control panel is one of utilitarian density. It follows Elementor's standard three-tab layout (Content, Style, Advanced), which is a good sign—it shows the developers understand the ecosystem they're building for. There's no jarring, custom UI to learn. However, the sheer number of options, particularly the preset dropdown, can be initially overwhelming. It's a testament to the plugin's scope but also a hint that you'll need a moment to get your bearings.
A Granular Look at the Widget's Controls
The real test of any Elementor addon is the depth and logic of its controls. Let's break down what the BWD Image Hover Effect widget offers, tab by tab.
The Content Tab: The Structural Foundation
The Content tab is where you define the core components of your interactive image. The most important setting here is the first one.
- Choose Style: This dropdown menu is the heart of the plugin. At the time of this review, there are over 30 unique styles, each offering a different animation preset. The naming convention ("Style 1," "Style 2," etc.) isn't very descriptive, so you'll have to do some clicking and exploring to see what each one does. The styles range from simple fades and slides to more complex "shutter" effects, corner reveals, and 3D rotations. The variety is impressive, though some effects feel more modern and usable than others.
- Image: This is a standard Elementor image control, allowing you to select an image from the WordPress Media Library. It also includes the `Image Size` dropdown, which is crucial for performance. Always choose the smallest appropriate size to avoid loading unnecessarily large files.
- Content Alignment: This lets you set the horizontal and vertical alignment of the text content that appears on hover. Standard options like Left, Center, Right, and Justify are available.
- Title & Description: Simple text input fields for the overlay content. A critical feature here is the Title HTML Tag selector. This allows you to choose between H1-H6, div, span, or p. From an SEO and accessibility standpoint, this is excellent. It ensures you can maintain a proper document outline without being forced into using a specific tag for styling purposes.
- Call to Action (Button): You can add a button or a simple link to the hover effect. The options here are robust, allowing you to set the link URL, button text, and even add an icon from the Font Awesome or custom icon libraries. The link options include the standard `Open in new window` and `Add nofollow` checkboxes.
The Content tab is well-organized and provides all the necessary structural elements. The inclusion of the HTML tag selector for the title is a thoughtful touch that developers will appreciate.
The Style Tab: Where the Magic Happens
If the Content tab is the skeleton, the Style tab is the skin. This is where you move beyond the chosen preset and tailor the effect to match your site's branding and design language. The level of granularity here is what separates a great addon from a mediocre one.
- Common Box Style: This section contains global styling for the entire widget container. You can control padding, background (for both normal and hover states), border type, border-radius, and box-shadow. These are foundational CSS properties, and having them readily available with responsive controls is essential.
- Image Style: This section is surprisingly sparse, only offering an option for a CSS filter on hover (e.g., blur, grayscale). Most of the image manipulation is handled by the preset effect itself. In most cases this is fine, but it means you can't, for example, easily apply a persistent grayscale filter that is removed on hover. You would need custom CSS for that.
- Content Style: This is arguably the most important section in the Style tab. It's a container for several sub-sections:
- Title: Full typography controls (font family, size, weight, transform, style, decoration, line-height, letter-spacing) and text color options for both normal (pre-hover) and hover states. You can also add a text-shadow.
- Description: The same comprehensive set of typography and color controls as the title.
- Spacing: Crucially, you can control the margin below the title and description, allowing you to fine-tune the vertical rhythm of your overlay content.
- Button Style: If you've enabled a call to action, this section provides exhaustive styling options. You can control typography, text/background color, border, border-radius, and padding for both normal and hover states independently. This level of control is on par with Elementor's native Button widget.
Overall, the styling options are extensive. The ability to define separate styles for normal and hover states on text elements is powerful. This means you can have a title change color as the background overlay animates in, creating a more dynamic effect. The responsive controls (the little desktop, tablet, and mobile icons) are present for nearly every setting, which is a hallmark of a well-developed Elementor addon.
Performance, Markup, and the Developer's Perspective
A fancy widget is useless if it destroys your site's performance or generates a mess of code that's impossible to maintain. This is where we need to look under the hood.
Asset Loading and Page Weight
One of the biggest concerns with large "mega-addons" is that they load massive CSS and JavaScript files on every single page of your site, regardless of whether you're using their widgets. A well-coded plugin, however, will only enqueue its assets when the widget is actually present on the page being rendered.
Based on my inspection, BWD Image Hover Effect does a decent job of this. It loads a primary CSS file (e.g., `ih-public.css`) that contains the styling for all 30+ effects. While loading the styles for all effects isn't perfectly optimal (ideally, it would only load the CSS for the specific styles you're using), it's a common and generally acceptable compromise in the Elementor ecosystem. The file size is reasonable and shouldn't have a catastrophic impact on page load times, but it is an added request and a few extra kilobytes to your page weight. For a performance-obsessed developer building a site with only one or two simple hover effects, writing a few lines of custom CSS would still be lighter. For anyone using multiple, complex styles, the plugin provides a net benefit.
Generated HTML Markup
Let's inspect the DOM. The widget generates a primary wrapper `div` with a series of nested elements. A typical structure looks something like this:
<div class="bwd-image-hover-effect-common bwd-style-1"><div class="bwd-image-hover-effect-img"><img src="..." alt="..."><div class="bwd-image-hover-effect-content"><h3>Title</h3><p>Description</p></div></div></div>The markup is reasonably clean. It avoids being overly nested, which is good. The class names are specific and well-structured, making it relatively easy to target elements with custom CSS if needed. Using semantic tags like `h3` and `p` (as chosen in the Content tab) is a major plus for accessibility and SEO. It's not as semantically pure as a `<figure>` and `<figcaption>` element, which would be the textbook ideal for an image with a caption, but it's a far cry from the unsemantic "div soup" that some other addons produce.
CSS Specificity and Overrides
The plugin's CSS rules are generally well-written. They are specific enough to work correctly but don't frequently resort to using `!important`, which is a major sin in CSS development. This means that if you need to override a particular style—for example, changing the transition speed or color for a specific instance—you can do so with relative ease using Elementor's Custom CSS feature or your theme's stylesheet without fighting a specificity war.
The Verdict: A Powerful Tool with a Clear Purpose
After a thorough review, the BWD Image Hover Effect addon for Elementor proves to be a highly capable and feature-rich tool. It successfully addresses a common limitation in Elementor's native toolset, empowering users to create complex and engaging visual effects without writing a single line of code.
Pros:
- Massive Preset Library: The sheer quantity of effects is the plugin's biggest selling point. It provides a fantastic starting point for almost any design need.
- Deep Customization: You are not locked into the presets. The Style tab offers granular control over typography, colors, spacing, and borders, allowing for full brand alignment.
- Developer-Friendly Features: The inclusion of HTML tag selectors and clean, predictable markup shows a consideration for professional workflows.
- Good Responsive Controls: The ability to adjust nearly every style setting across different breakpoints is essential and well-implemented.
- Time-Saving: For agencies and freelancers, this plugin can shave hours off a project by replacing the need for custom-coded CSS animations.
Cons:
- Potential for Overuse: With so many flashy effects available, there's a danger of designers going overboard and creating a visually chaotic experience. Restraint is key.
- Asset Loading Could Be More Granular: Loading a single CSS file for all effects is a minor performance compromise. It's not a deal-breaker, but it's not perfectly optimized.
- Hover on Touch Devices: This isn't a flaw of the plugin itself, but a general limitation of hover-based effects. On mobile, the "hover" state is typically triggered on the first tap, and the link is followed on the second. This can be a clunky user experience. It's important to design with this in mind, ensuring critical information isn't hidden exclusively behind a hover state.
Who Is This Plugin For?
- Elementor Power Users & Agencies: This is the ideal user. The plugin provides a robust tool to quickly add value and visual polish to client sites, justifying its place in any serious Elementor toolkit.
- Business Owners & DIY Designers: For those less comfortable with code, this plugin is an incredibly accessible way to elevate a website's design beyond a basic template.
- Senior Developers: For a developer, this addon is a situational tool. It's perfect for rapid prototyping or for projects where the client needs a wide variety of effects and the ability to easily edit them later. For a simple, highly-performant site with only one or two effects, writing the 20-30 lines of custom CSS might still be the preferred, more lightweight approach.
In the final analysis, the BWD Image Hover Effect addon is a solid, well-constructed piece of software that delivers on its core promise. It effectively democratizes access to complex CSS animations within the Elementor environment. It strikes a strong balance between a vast array of pre-built options and the deep customization needed for professional-grade work. For anyone looking to make their images work harder, this plugin is a worthy and powerful contender. If you're looking to expand your design capabilities, you can find a wide variety of other tools among the many Free download WordPress themes and plugins available that follow similar principles of extensibility and value.