SwissEagle Theme In-Depth Review: A Developer's Guide to Buildi
-
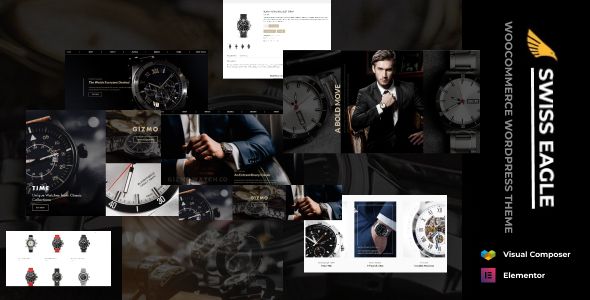
SwissEagle Theme In-Depth Review: A Developer's Guide to Building a Luxury Watch Store
When you're selling products that cost thousands, sometimes tens of thousands, of dollars, your website can't look like it was slapped together for a dropshipping venture. It needs to exude precision, luxury, and trust. This is the promise of themes built for high-end e-commerce, and today we're putting one under the microscope: the SwissEagle - Watch Store WordPress theme. It positions itself as a premium solution for horologists and jewelers aiming to build a digital storefront that mirrors the quality of their physical products. But in the world of WordPress, a polished demo can hide a multitude of sins—from performance-killing bloat to a customization nightmare. As a developer who has navigated the treacherous waters of premium themes for years, I'm here to dissect SwissEagle from the inside out. We'll go beyond the shiny screenshots and dig into its architecture, usability, and real-world performance. We'll then walk through a complete installation and setup process, so you know exactly what you're getting into before you commit.
Part 1: The First Impression — Does it Look the Part?
A theme for luxury watches has one primary job: to create an atmosphere of exclusivity and quality. The user shouldn't just be browsing products; they should be having an experience. SwissEagle's demos immediately go for a dark, high-contrast aesthetic. This is a classic choice for luxury goods. Dark backgrounds make product photography, especially metallic and jeweled items, pop. The typography is a mix of a clean, sharp sans-serif for body copy and UI elements, paired with a more elegant, sometimes bolder, serif or display font for headings. This combination works. It’s legible but carries a sense of authority.
Visuals and User Experience (UX)
The layout is heavily reliant on high-quality imagery, which is non-negotiable for this niche. The homepage demos feature large hero sections, often powered by the bundled Revolution Slider plugin. These are designed to showcase cinematic shots of signature timepieces. Below the fold, you get a mix of product carousels, category grids, and brand showcases. It's a standard but effective e-commerce homepage structure.
The navigation is handled by a robust mega menu. For a store with multiple brands, collections, and categories (e.g., Men's, Women's, Chronograph, Automatic), a mega menu is essential. SwissEagle's implementation is visual, allowing for images alongside category links, which can significantly improve user orientation. The single product page is where the theme needs to shine, and it does a decent job. It features a prominent product gallery with zoom functionality, clear pricing, and well-organized tabs for descriptions, specifications, and reviews. The "Add to Cart" button is distinct, and there's a good sense of visual hierarchy.
The Critical Eye: Potential UX Pitfalls
While the overall look is strong, I have a few initial concerns from a UX perspective. First, the reliance on animations and transitions can be a double-edged sword. Subtle fades and slides can add a touch of class, but the demos occasionally use more aggressive effects that can feel distracting rather than premium. On a live site, these can also contribute to perceived slowness, making the experience feel sluggish instead of smooth.
Second, the sheer amount of information and visual elements on some of the demo pages verges on being overwhelming. A luxury experience is often about minimalism and focus. A developer or store owner will need to be disciplined in culling unnecessary sections to prevent the pages from feeling cluttered. The goal is to guide the user, not bombard them. You're selling a Patek Philippe, not bargain electronics.
Part 2: Under the Hood — A Developer's Technical Teardown
This is where we separate the contenders from the pretenders. A beautiful theme built on a shaky foundation is a long-term liability. It will be slow, difficult to maintain, and a security risk. Let's look at SwissEagle's core components.
The Tech Stack: Elementor and a Host of Plugins
SwissEagle is built on the Elementor page builder. This is a popular choice and for good reason—it gives non-technical users a powerful drag-and-drop interface. The theme comes bundled with a set of custom Elementor widgets specifically for its design, such as stylized product grids, testimonial blocks, and brand carousels. This is a common practice, but it creates a dependency: your site's design is now intrinsically tied to both Elementor and the theme's proprietary add-ons.
Beyond Elementor, the theme relies on a significant number of bundled plugins. Here’s a typical list you'll be prompted to install:
- WooCommerce: The e-commerce engine. This is standard and expected.
- Elementor: The core page builder.
- Slider Revolution: For the hero sliders. A powerful but notoriously heavy plugin.
- Contact Form 7: For forms. A classic, though there are more modern alternatives.
- A theme-specific core plugin: This usually contains the custom post types, shortcodes, and custom Elementor widgets. This is the biggest point of "lock-in."
- WooCommerce Wishlist & Compare: Standard e-commerce features that are often better handled by dedicated plugins but are included for convenience.
This dependency on multiple, heavy plugins is a major red flag for performance. Right out of the box, before any optimization, you can expect a site built with SwissEagle to load a significant number of CSS and JavaScript files. Getting this theme to score well on Google's Core Web Vitals will not be a simple task. It will require a robust caching strategy (like WP Rocket), image optimization (both compression and serving in next-gen formats like WebP), and potentially a Content Delivery Network (CDN).
Code Quality and Maintainability
Without auditing the theme's PHP files line by line, we must make some educated assumptions based on common practices. Premium themes from marketplaces like ThemeForest (where many themes of this type originate) can be a mixed bag. The best are well-structured, follow WordPress coding standards, and make heavy use of hooks and filters for easy modification. The worst are a tangled mess of hardcoded values and poorly written functions.
The most important factor for any developer is the availability and proper implementation of a child theme. SwissEagle includes one, which is a good sign. Any customizations—whether CSS tweaks or overriding template files (like `single-product.php` or `header.php`)—must be done in the child theme. Modifying the parent theme directly is a cardinal sin in WordPress development, as your changes will be wiped out with the next theme update.
The reliance on a "core" functionality plugin is also a concern for long-term maintenance. If you ever decide to switch themes, you'll lose all the custom widgets and post types, potentially breaking your site's layout and content. This is a form of "theme lock-in" that developers need to be aware of and plan for. When building for a client, you must explain this dependency. Sourcing your themes from a provider like gplpal can mitigate some of the financial risk, but the technical dependency remains.
Part 3: Step-by-Step Installation and Configuration Guide
Let's move from theory to practice. You've evaluated the pros and cons and decided to move forward. Here is a no-nonsense guide to getting SwissEagle installed and looking like the demo. This process assumes you have a fresh WordPress installation on a decent hosting provider.
Prerequisites
- A working WordPress installation (latest version).
- FTP or cPanel File Manager access (for troubleshooting).
- WooCommerce installed and activated. You can do this before or during the theme setup.
- li>The SwissEagle theme zip file (`swisseagle.zip`) and the child theme zip file (`swisseagle-child.zip`).
Step 1: Install the Parent and Child Themes
Never skip the child theme. I cannot stress this enough. It is your safety net for future updates and customizations.
- Log in to your WordPress dashboard.
- Navigate to Appearance > Themes.
- Click Add New at the top, then Upload Theme.
- Choose the `swisseagle.zip` file and click Install Now. Do NOT activate it yet.
- Return to the Themes page by clicking the link.
- Repeat the process: Click Add New > Upload Theme, but this time select the `swisseagle-child.zip` file.
- Once the child theme is installed, you can now click Activate. Your active theme should be "SwissEagle Child".
Step 2: Install the Required Plugins
Upon activating the child theme, you will almost certainly see a banner at the top of your dashboard prompting you to install required and recommended plugins. This is typically managed by the TGM Plugin Activation library.
- Click the "Begin installing plugins" link in the banner.
- You'll be taken to a new screen listing all the plugins the theme needs. Select all the "Required" plugins.
- Be more critical of the "Recommended" plugins. Do you really need that specific social sharing plugin, or do you have a preferred one? Install only what you know you will use. Every extra plugin is a potential performance drain and security vulnerability.
- From the "Bulk Actions" dropdown, select Install and click Apply.
- Wait for all plugins to install. This may take a minute.
- Once finished, click the "Return to Required Plugins Installer" link at the bottom.
- Now, select all the plugins again, and from the "Bulk Actions" dropdown, select Activate and click Apply.
Step 3: Import the Demo Content
This is the magic step that makes your site look like the live preview. It's also the step most likely to fail, especially on cheaper shared hosting due to low server resource limits (like `max_execution_time`).
- Find the Demo Import option. This is usually located under Appearance > Import Demo Data or a dedicated theme options panel (e.g., "SwissEagle Options").
- You will likely see several demo layouts to choose from. Select the one that best fits your vision.
- Before you click "Import," read the instructions carefully. It will likely warn you that this should only be done on a fresh WordPress installation. It will import pages, posts, menus, widgets, and theme settings.
- Click the Import button. This process can take several minutes. Do not navigate away from the page. Let it run, even if it appears to be stuck.
- If the import times out or fails, you may need to contact your hosting provider to have them temporarily increase your server's PHP resource limits.
Step 4: Post-Import Cleanup and Configuration
Once the demo import completes successfully, your site will look similar to the demo, but it's not "yours" yet. Now comes the essential configuration.
- Set Your Homepage: Go to Settings > Reading. Ensure "Your homepage displays" is set to "A static page." From the "Homepage" dropdown, select the imported homepage (e.g., "Home 1," "Main Home"). Set your "Posts page" to "Blog" if you plan on having one.
- Assign Menus: Go to Appearance > Menus. You will likely find several imported menus. Find the main menu (often called "Primary Menu" or "Main Menu") and assign it to the "Primary" theme location in the "Menu Settings" at the bottom. Save the menu.
- Update Your Branding: Go to Appearance > Customize or the theme options panel. This is where you'll upload your own logo, update the site title and tagline, and change the favicon.
- Adjust Theme Options: Spend time exploring the Theme Options panel. This is your control center for changing global colors, typography, header layouts, and footer settings. Make small changes and check the front-end of your site to see the effect.
- Configure WooCommerce: Navigate to WooCommerce > Settings. Run through the setup wizard if you haven't already. At a minimum, you need to set your store's address, currency, payment gateways (like Stripe or PayPal), and shipping zones.
- Start Replacing Content: Now the real work begins. Edit the homepage using Elementor (click "Edit with Elementor" on the front-end admin bar). Start replacing the demo images and text with your own content. Go through the imported products in the Products tab and either delete them or edit them to reflect your own inventory.
Part 4: The Verdict — Is SwissEagle a Good Investment?
After a thorough review and walkthrough, it's clear that SwissEagle is a powerful but demanding theme. It's not a simple plug-and-play solution for a complete beginner, but it can be an incredible accelerator for the right user.
The Good (Pros)
- Stunning Aesthetics: Out of the box, the design language is perfectly suited for luxury watches, jewelry, and other high-end goods. It effectively creates a premium feel.
- Feature-Rich: With a mega menu, product comparison, wishlists, and various layout options, it includes most of the features a modern e-commerce store needs.
- Fast Startup with Demo Import: The one-click demo import provides an excellent starting point, saving dozens of hours in initial page building and layout configuration.
- Elementor Integration: For those comfortable with Elementor, managing page content and layouts is intuitive and requires no code.
The Bad (Cons)
- Performance Overhead: This is the biggest issue. The theme's reliance on multiple heavy plugins like Slider Revolution and its own set of scripts means it will require significant optimization to be fast.
- Plugin Lock-In: The heavy dependence on a theme-specific core plugin and bundled widgets makes migrating to a new theme in the future a very difficult task.
- Complexity: The sheer number of options in the theme panel and Elementor can be overwhelming. It's easy to break the delicate design if you don't know what you're doing.
- Fragile Design: The premium look is highly dependent on professional-grade product photography and a consistent visual style. Low-quality images or inconsistent branding will quickly shatter the illusion of luxury.
Final Recommendation: Who Is It For?
You should consider SwissEagle if:
- You are a store owner or a developer who loves the demo design and plans to change only the content (images, text, products), not the fundamental layout.
- You have a budget for premium hosting and caching tools to mitigate the inherent performance issues.
- You are building a site for a client and need a visually impressive result quickly, and the client understands the long-term maintenance implications.
You should probably avoid SwissEagle if:
- You are a performance purist who prioritizes Core Web Vitals above all else. Building a lightweight site from a block-based theme or a custom framework would be a better path.
- You are a complete WordPress beginner. The complexity might lead to frustration.
- Your brand has a unique, established identity that clashes with the theme's strong, opinionated design. Trying to force this theme to look completely different would be more work than starting from scratch.
Ultimately, SwissEagle is a tool. In the right hands, it can build a beautiful, functional, and profitable online watch store. But it demands respect for its complexity and a commitment to optimization. For those looking to explore a wide variety of similar options, browsing a catalog of Free download WordPress themes can provide valuable perspective on the different approaches available in the market today.