Run Brewery Technical Review: A Developer's Deep Dive into Code
-
Run Brewery Technical Review: A Developer's Deep Dive into Code, Customization, and Deployment
The web is saturated with fleeting content, and holding a user's attention is the modern-day gold rush. Static pages and blog posts often aren't enough. This has led to a renaissance of lightweight, browser-based experiences, with HTML5 games emerging as a powerful tool for engagement. They require no downloads, run on virtually any device, and can turn a passive visitor into an active participant. Today, we're tearing down the Run Brewery - HTML5 Game, a "ready-to-deploy" endless runner package. The promise is simple: upload some files and you have an instant, brandable game for your website. But as any developer knows, "ready-to-deploy" can mean anything from a pristine codebase to a tangled mess of obfuscated JavaScript. This is a review for the person who has to make it work—the developer, the technical marketer, the agency owner. We'll dissect its code, walk through a professional installation, and explore its true potential for customization and monetization.
First Impressions: Gameplay and Presentation
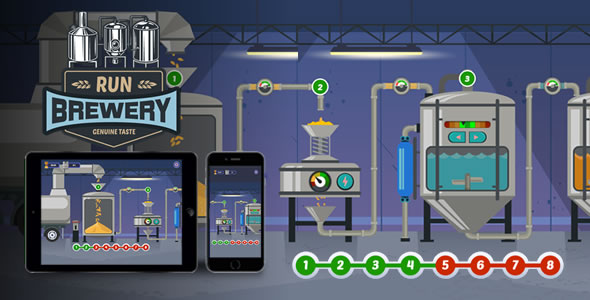
Before diving into the code, let's look at the product from a user's perspective. Run Brewery is a classic side-scrolling endless runner. The player character, a cheerful brewer, sprints automatically across a cartoonish landscape. The only control is a tap or click to jump. The objective is to leap over obstacles like barrels and collect floating mugs of beer to increase your score. Hit an obstacle, and it's game over. It’s a simple, proven formula that requires minimal instruction.
The art style is clean, vibrant, and generic in a commercially safe way. The vector-based graphics are scalable and look sharp on high-DPI displays. The animations are fluid enough; the character has a decent run cycle, and the jump is responsive. Sound design consists of a looping, upbeat background track and a few essential sound effects for jumping, collecting items, and crashing. It’s functional but not memorable. After a few minutes, most users will likely mute it.
The gameplay loop is tight but shallow. The difficulty ramps up by increasing the frequency and complexity of obstacle patterns. The immediate feedback and the "one more try" nature of the high-score chase can be compelling for short bursts. However, there are no power-ups, no new mechanics are introduced, and there's no long-term progression system. This isn't a flaw for its intended purpose—a short-session engagement tool—but it limits its potential as a destination game. The core experience is solid but feels more like a template than a finished, feature-rich product. That's not necessarily a bad thing; for a developer, a clean template is often better than a bloated, opinionated system.
Technical Teardown: A Look Under the Hood
This is where the real evaluation begins. A slick presentation can hide a nightmare of unmaintainable code. Unzipping the package reveals a standard, self-contained web project structure:
index.html: The main entry point for the game.css/: Contains a single stylesheet, likely for styling the game container and UI elements.js/: The heart of the application. This folder contains the game logic and any libraries.assets/: All the game's media—images, spritesheets, and audio files.
Code Quality and Frameworks
Popping open the
js/directory, we find a collection of JavaScript files. The good news is that the code is not obfuscated. It's minified, which is standard practice for production, but readable source maps or un-minified versions are often included in higher-quality packages. Here, we have to rely on browser developer tools to "pretty-print" the code for analysis. Upon inspection, it's clear the game is built on the CreateJS suite—specifically EaselJS for rendering to the canvas, TweenJS for animations, and PreloadJS for asset management. This is a solid, mature choice. CreateJS is less of a heavyweight engine than Phaser and is known for its straightforward, Flash-like API, which makes it relatively easy for developers with a background in Flash or Animate CC to pick up.The main game logic appears to be consolidated within a file like
main.jsorgame.js. The code is structured using object-oriented principles, with classes or prototypes for the Player, Obstacles, and the Game Controller. Global variables are present but largely contained within a main game object, which prevents polluting the global namespace—a sign of competent development. However, the code lacks comments. Without them, a developer new to the codebase will spend significant time tracing function calls to understand how different modules interact. Variables for game physics, likeGRAVITY,JUMP_FORCE, andGAME_SPEED, are hardcoded as magic numbers within functions rather than being defined as constants at the top of the file. This is a major red flag for customization; changing the game's feel will require a careful search-and-replace operation rather than tweaking a single configuration block.Performance Analysis
From a performance standpoint, Run Brewery is exceptionally lightweight. The total package size is under 2MB, which is excellent for quick load times, even on mobile connections. It makes smart use of a spritesheet for character animations. Instead of loading dozens of individual frames, it loads one single image and then displays different portions of it for each frame of the animation. This drastically reduces the number of HTTP requests, which is a key performance optimization. The background is a simple, looping image, which is efficient for this style of game.
Running the Chrome DevTools Performance profiler while playing shows a stable frame rate, typically hovering around 60 FPS on a modern desktop and a mid-range smartphone. The CPU usage is minimal. The game appears to be well-optimized for its simple mechanics. There are no obvious memory leaks during a 10-minute play session. The rendering is entirely 2D canvas-based, avoiding the overhead of WebGL for a game that doesn't need it. The only potential bottleneck could be on very low-end devices if the screen resolution is extremely high, as rendering to a larger canvas requires more processing power. Overall, the performance is a strong point.
Responsiveness and Cross-Browser Compatibility
The game is designed to be responsive, but its implementation is basic. It uses JavaScript to scale the canvas element to fit the width or height of its container while maintaining the game's aspect ratio. This works well for embedding it within a content area. However, it doesn't adapt its layout for different aspect ratios. On an ultra-widescreen monitor, you'll get black bars (letterboxing) on the sides. On a tall, narrow phone screen, you'll get black bars on the top and bottom. The UI elements (like the score) are positioned relative to the canvas and scale with it, so they don't break. This approach is simple and reliable, but a more sophisticated implementation might adjust the field of view or UI layout for a more native feel on different devices. Compatibility is excellent, as expected from a CreateJS project. It ran flawlessly on Chrome, Firefox, and Safari on both desktop and mobile platforms.
Installation and Integration Guide
Getting the game from a ZIP file onto your website is straightforward, but a few best practices can make the integration cleaner and more professional. Here's a step-by-step guide for developers.
Prerequisites
You'll need access to a web server. This can be a shared hosting account with cPanel, a VPS, or even a local development server like XAMPP or MAMP for testing. You should be comfortable using an FTP client (like FileZilla) or a web-based file manager.
Method 1: Standalone Deployment
This is the quickest way to get the game live, ideal for hosting it on a subdomain (e.g., `game.yourwebsite.com`) or in a subfolder.
- Create a Directory: On your web server, create a new folder where you want the game to live. For example, `/public_html/brewery-game/`.
- Upload Files: Unzip the game package on your local machine. Using your FTP client or file manager, upload the entire contents (the `index.html`, `js/`, `css/`, and `assets/` folders) into the directory you just created.
- Verify Permissions: Ensure that the files and folders have the correct permissions to be readable by the web server. Typically, folders should be `755` and files should be `644`. Most hosting environments handle this automatically.
- Access the Game: Navigate to the URL in your browser (e.g., `https://yourwebsite.com/brewery-game/`). The game should load and be fully playable.
Method 2: WordPress Integration
Most users will want to embed the game directly into a WordPress post or page to surround it with other content. The best way to do this is with an `iframe`, which isolates the game's code from your WordPress theme's code, preventing CSS or JavaScript conflicts.
- Upload the Game Files: Follow Step 1 and 2 from the Standalone method. You still need to host the game files somewhere on your server. A subfolder is a perfect location.
- Embed with an iframe: Go to the WordPress post or page where you want to add the game. Switch to the "Text" or "Code" editor (not the Visual editor). Paste the following HTML snippet, replacing the `src` URL with the actual URL to your game:
<div style="position: relative; width: 100%; padding-top: 56.25%;">
<iframe src="https://yourwebsite.com/brewery-game/" style="position: absolute; top: 0; left: 0; width: 100%; height: 100%; border: 0;" allowfullscreen></iframe>
</div>
This snippet includes a CSS wrapper (`div`) to make the iframe responsive and maintain a 16:9 aspect ratio. You can adjust the `padding-top` percentage to match the game's native aspect ratio if needed. - Advanced (Shortcode Method): For cleaner and reusable implementation, you can create a custom shortcode. Add the following code to your theme's `functions.php` file:
function brewery_game_shortcode() {
    $url = 'https://yourwebsite.com/brewery-game/'; // Set your game URL here
    return '<div style="position: relative; width: 100%; padding-top: 56.25%;"><iframe src="' . esc_url($url) . '" style="position: absolute; top: 0; left: 0; width: 100%; height: 100%; border: 0;" allowfullscreen></iframe></div>';
}
add_shortcode('brewery_game', 'brewery_game_shortcode');
Now, you can simply type `[brewery_game]` in your WordPress editor to embed the game. This approach is far superior as it keeps messy HTML out of your posts and allows you to update the game's URL in one central location. Integrating interactive content like this can significantly boost engagement on a site, whether it's a personal blog or a corporate page built with one of the many Free download WordPress themes available.
Customization and Monetization
A stock game is a missed opportunity. The real value of an asset like this lies in your ability to re-brand it, tweak its mechanics, and integrate monetization. Given the source code is provided by distributors like gplpal under a GPL license, you have the freedom to modify it extensively.
Re-skinning the Game
Changing the visual identity of Run Brewery is the most impactful and straightforward customization.
- Character Sprite: In the `assets/` folder, you'll find the character's spritesheet (e.g., `player_sprite.png`). To create your own character, you must create a new spritesheet with the exact same dimensions and frame layout. Each frame of the animation must occupy the same position as in the original file.
- Obstacles and Collectibles: These are typically individual image files (`barrel.png`, `mug.png`). Replacing these is as simple as creating new PNGs with the same filenames and dimensions.
- Background: The background is a seamless, looping image. You can replace it with any tileable image to completely change the game's environment.
The biggest challenge is matching the art style. Unless you're a skilled artist, it's best to commission a set of assets to ensure a cohesive look.
Modifying Game Logic
This is where the lack of comments and hardcoded variables becomes a real pain point. To change game mechanics, you'll need to dive into the minified (but pretty-printed) JavaScript file. Using your browser's search function (Ctrl+F), you can look for numerical values to identify key parameters.
- Game Speed: Search for lines that increment the x-position of background elements or obstacles. You'll likely find a variable that controls the speed, which you can increase or decrease. You might also find a speed-up factor that is applied over time to make the game harder.
- Jump Physics: Look for variables related to gravity and jump force. These are often initialized near the player object's creation. Small tweaks to these values can dramatically alter how the game feels.
- Scoring: Find the code that executes when the player collides with a collectible. There will be a line that increments the score variable (e.g., `score += 10;`). You can change this value easily.
Before making changes, create a backup of the original JavaScript file. This process is tedious and requires patience, but it's entirely possible to rebalance the game to your liking.
Monetization Strategy
HTML5 games are prime real estate for advertisements. The game's code has natural hooks for ad placement.
- Pre-Roll Ad: The game has a "Start" screen. You can edit `index.html` to display a video ad container before showing the game canvas. Using JavaScript, you can hide the ad and start the game after the video completes or is skipped.
- Game Over Interstitial: The "Game Over" screen is the most effective place for an ad. In the game's JavaScript, locate the `gameOver` function. This is the perfect trigger to call the Google AdSense or another ad network's API to display a full-screen interstitial ad.
- Banner Ads: You can modify the `index.html` to place a banner ad above or below the game canvas. This is less intrusive but also generates less revenue.
Implementing these requires a basic understanding of ad network APIs but is a standard practice for monetizing this type of web content.
The Final Verdict
Run Brewery - HTML5 Game is a competent but unremarkable package. It delivers on its promise of a simple, deployable endless runner. Its performance is excellent, and its reliance on the mature CreateJS library ensures broad compatibility. For a non-technical user, it's a turnkey solution for adding a bit of interactive flair to a website.
For a developer, it's a mixed bag. The clean file structure and use of spritesheets are positives. However, the lack of commented source code and the prevalence of hardcoded "magic numbers" make deep customization a chore rather than a pleasure. It serves better as a functional black box than as a flexible foundation for a more ambitious project. If your goal is a quick, brandable micro-game for a marketing campaign or to increase on-page time, this asset is a perfectly adequate and cost-effective choice. If you are looking for a well-documented framework to build a unique and complex game, you should consider this a starting point that will require significant refactoring.