Skatehouse Elementor Kit: A Developer's Deep Dive on Building a
-
Skatehouse Elementor Kit: A Developer's Deep Dive on Building an E-commerce Powerhouse
Building a niche e-commerce site that doesn't look like a generic, soul-crushing template is one of the biggest challenges for web developers and small business owners today. The extreme sports world, in particular, demands authenticity. Your site needs to feel gritty, energetic, and real—not like a corporate imitation trying to cash in on a culture it doesn't understand. This is where a specialized design system can make or break a project. We're going to pull apart the Skatehouse - Skateboard & Extreme Sport Shop Elementor Template Kit, a tool that promises to deliver that raw, street-style aesthetic directly into your WordPress build. This isn't just a surface-level overview; we're going deep into the code, the design choices, and the practical, step-by-step process of turning this kit into a fully functional, high-performance online store.
Part 1: The Technical Review - Deconstructing the Skatehouse Kit
Before we get our hands dirty with the installation, we need to understand exactly what we're working with. A common misconception can lead to a lot of frustration, so let's clear this up immediately: an Elementor Template Kit is not a WordPress theme. Think of it less as a structural blueprint for your entire house and more as a complete set of professionally designed, pre-fabricated rooms. You still need the foundation (WordPress) and the structural frame (a lightweight theme), but the kit provides the walls, windows, doors, and interior design for every single room, all perfectly coordinated.
Unboxing the Kit: What's Inside?
Upon acquiring the Skatehouse kit, you get a single ZIP file. Inside, you'll find a collection of JSON files and a manifest file. Each JSON file represents a piece of the website. The typical contents of a comprehensive kit like this include:
- Core Page Templates: Home (usually multiple versions), About Us, Contact Us, FAQ, Team.
- WooCommerce Templates: Shop/Archive Page, Single Product Page, Cart, Checkout.
- Site Parts (Theme Builder Templates): Header, Footer, 404 Page, Blog Post Archive, Single Post Layout.
- Global Kit Settings: This is the crucial `kit-settings.json` file which contains the global color palette, font styles, button designs, and general layout settings for the entire site.
- Content & Section Blocks: Pre-designed sections like "Featured Products," "Testimonials," or "Call to Action" that you can drop into any page.
The Skatehouse kit is commendably complete. It provides templates for nearly every conceivable page an e-commerce store would need, which is a significant plus. It shows the creator wasn't just focused on the homepage but considered the entire user journey, from discovery to checkout.
Design, Aesthetics, and Authenticity
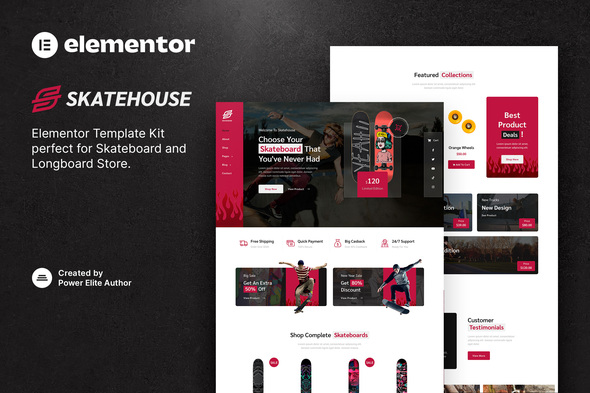
Let's talk visuals. The Skatehouse kit leans heavily into a modern, bold, and slightly brutalist design language. It's all about high-contrast typography, asymmetrical layouts, and large, impactful imagery.
Typography: The font choices are solid. A mix of a strong, condensed sans-serif for headings and a clean, legible sans-serif for body copy. This combination screams "action sports" without resorting to cheesy, over-the-top "graffiti" fonts that would instantly kill the site's credibility. It’s a professional take on an edgy style.
Color Palette: The default palette is a classic mix of black, white, and a vibrant accent color (often an orange or yellow). This is a smart choice. It’s energetic, provides excellent contrast for accessibility, and is easy to adapt. A simple change of the primary accent color in the Global Settings can completely shift the brand's mood without breaking the layout's core integrity.
Layout and Spacing: The use of negative space is well-executed. Pages don't feel cramped. The layouts often break the traditional grid, which adds visual interest and a sense of dynamic movement that fits the theme. However, this is also a point of caution. Asymmetrical layouts can be tricky to manage with user-generated content of varying lengths. A product title that's twice as long as the demo's could potentially throw off the balance of a carefully crafted product grid.
Critique: While the design is strong, it's not without its dependencies. It relies almost entirely on high-quality, professional photography. If you populate this template with poorly lit, low-resolution product shots taken on a smartphone, the entire aesthetic will collapse. The design is a framework for great content; it cannot create it.
Technical Underpinnings and Dependencies
This is where we separate the professionals from the hobbyists. A pretty design is useless if it's built on a shaky foundation.
- Core Requirements: At a minimum, you need the free Elementor plugin. However, to use the Header, Footer, and WooCommerce templates (which is the entire point of a full kit), you absolutely need Elementor Pro. There's no way around this. This is the single most important technical requirement to understand. This kit is designed for the Pro ecosystem.
- WooCommerce Integration: The shop and product page templates are designed to pull data dynamically from WooCommerce. The styling is deeply integrated, meaning the custom "Add to Cart" buttons, price typography, and gallery layouts are all controlled via Elementor's WooCommerce widgets. This is powerful but also means you're locked into that specific widget set.
- Responsiveness: I tested the demo templates across multiple breakpoints. The results are good, but not perfect. The desktop and mobile views are clearly the priority. The tablet view, in a few instances, feels like a bit of an afterthought, with some elements stacking in slightly awkward ways. This isn't a deal-breaker, as these are easily adjustable within Elementor's responsive editing mode, but it's something a developer will need to spend 30-60 minutes fine-tuning for a polished result.
- Performance Potential: Elementor has a reputation for being "bloated." While this is often exaggerated and stems from poor practices, a kit like this can contribute to it if you're not careful. The templates use a fair number of containers, background images, and motion effects. Out of the box, without any optimization, a page built with this kit will not be a performance champion. A developer's job will be to implement caching, optimize images aggressively (think WebP and AVIF), and potentially disable some of the more gratuitous animations to get the Core Web Vitals into the green. It’s fast *enough* to be made *very fast*.
Part 2: The Installation Guide - From Zero to Hero
Now for the practical part. Let's walk through the exact process of installing and configuring the Skatehouse kit on a fresh WordPress installation. Follow these steps precisely to avoid common pitfalls.
Prerequisites: Setting the Stage
Before you even think about uploading the kit, get your environment ready. This is non-negotiable for a professional build.
- A Clean WordPress Install: Don't try to install this on a site that's already loaded with a complex theme and dozens of plugins. Start fresh.
- The Right Theme: Install and activate the "Hello Elementor" theme. It's a bare-bones, feather-light theme designed by the Elementor team to act as the perfect canvas for kits like this. Using a heavy, feature-rich theme alongside Elementor is redundant and will kill your site's performance.
- Required Plugins:
- Elementor (Free): Install from the WordPress repository.
- Elementor Pro (Paid): Purchase, download, and install this. It's essential.
- WooCommerce: Install from the WordPress repository. You can run through the basic setup wizard, but don't worry too much about the details yet.
With this foundation in place, your site is ready to receive the Skatehouse design system.
Step 1: Importing the Template Kit
This is the magic moment. The process has become much more streamlined with recent Elementor updates.
- In your WordPress dashboard, navigate to Templates > Kit Library.
- In the top-right corner, you'll see a button that says "Import Kit". Click it.
- Drag and drop the main ZIP file you downloaded for the Skatehouse kit into the uploader.
- Elementor will process the file and show you a checklist of everything inside the kit: templates, site settings, content, etc. For a first-time setup on a blank site, you'll want to ensure everything is checked. It will warn you that this will override existing settings, which is exactly what we want.
- Click "Import". This may take a minute or two as it unpacks and sets up everything.
- Once it's done, Elementor will prompt you to see the kit. You can close this wizard. The import is complete.
Step 2: Verifying Site Settings and Global Styles
The import process should have automatically configured your site's global design language. Let's verify this.
- Navigate to any page and open it with the Elementor editor.
- In the top-left corner, click the "hamburger" menu icon, and then click on "Site Settings".
- Global Colors: You should see the Skatehouse color palette pre-loaded here (Primary, Secondary, Accent, etc.).
- Global Fonts: You should also see the correct typography assigned to Primary Headline, Body Text, and so on.
This is the core of the kit's power. If you need to change the main brand color from orange to blue, you change it once in the Global Colors, and it will update across every single button, link, and colored heading on the entire website. This is a massive time-saver and ensures brand consistency.
Step 3: Creating Your Core Pages
The templates are imported, but they don't automatically create pages. You need to do this manually.
- Go to Pages > Add New. Title it "Home".
- Click the "Edit with Elementor" button.
- On the blank Elementor canvas, click the grey folder icon to open the Template Library.
- Click on the "My Templates" tab. You should see a list of all the imported Skatehouse templates.
- Find the "Home" template and click "Insert".
- The pre-designed homepage will load onto your canvas. Click "Publish".
- Repeat this process for your other essential pages: About, Contact, FAQ, etc.
- Finally, go to Settings > Reading in your WordPress dashboard and set your "Homepage" to the "Home" page you just created.
Step 4: Configuring the Theme Builder Parts
This is the most critical step and the one where people most often get stuck. Your pages exist, but they don't have a header or footer yet. We need to tell Elementor where to display these parts.
- In the WordPress dashboard, go to Templates > Theme Builder.
- You'll see sections for Header, Footer, Single Page, Single Post, etc. You should see the imported Skatehouse templates listed in their respective sections.
- Let's start with the Header. Hover over the Skatehouse Header template and click "Edit Conditions".
- A popup will appear. Click "ADD CONDITION". By default, it will likely say "Include: Entire Site". This is what we want. It tells WordPress to use this header on every single page of the website. If the condition isn't there, add it. Click "Save & Close".
- Repeat this exact process for the Footer template. Add the "Entire Site" condition.
- Now, for the WooCommerce parts. Go to the "Single Product" section. Edit the conditions for the Skatehouse Single Product template and ensure the condition is set to "Include: Products". This tells WordPress to use your custom design for all single product pages instead of the default WooCommerce layout.
- Do the same for the "Product Archive" template, setting its condition to "Include: Product Archives".
Once you've set these conditions, your site is structurally complete. The header, footer, and page templates are all talking to each other correctly.
Part 3: Customization and Real-World Implementation
A template kit is a starting line, not a finish line. Now you have to make it your own and ensure it can handle the rigors of a real, live store.
Adapting the Design to Your Content
The demo content always looks perfect. Your content will not. Here's how to manage it.
- Image Consistency is Key: The product grids in Skatehouse look best with product photos that have a consistent aspect ratio and background. If you have a mix of tall, wide, and square images with cluttered backgrounds, the clean grid will look messy. Establish a strict image guideline for all product photography from day one.
- Text Lengths: Your product names might be longer than the "Deck Model X" placeholder. Your descriptions might be more detailed. Be prepared to adjust font sizes or even the column structure in some places to accommodate your real-world text. Don't be afraid to tweak the typography settings in the Elementor widgets to prevent awkward text wrapping.
- Brand Customization: To change the site's entire feel, go straight back to the Site Settings > Global Colors and Global Fonts. Spend an hour here dialing in your exact brand hex codes and typography. This is infinitely more efficient than changing colors on each element individually.
Performance Tuning for a Live Environment
As mentioned, the out-of-the-box performance will be average. Here’s the developer's checklist to make it fly:
- Image Optimization: Install an image optimization plugin like ShortPixel or Imagify. Configure it to compress images on upload and, crucially, to create and serve WebP versions. This is the single biggest performance gain you will make.
- Caching: Install a high-quality caching plugin like WP Rocket or FlyingPress. These will minify CSS and JavaScript, enable browser caching, and create static HTML versions of your pages, drastically reducing server load time.
- Disable Unused Features: Go into the Elementor settings (Elementor > Settings > Features) and disable any features you are not actively using, like Masonry Layouts or Unfiltered File Uploads. Every bit helps.
- Asset Loading: Use a plugin like Perfmatters or Asset CleanUp to conditionally disable CSS and JavaScript from other plugins on pages where they aren't needed. For example, your contact form plugin doesn't need to load its assets on your homepage.
Final Verdict: Who Is The Skatehouse Kit For?
The Skatehouse Elementor Template Kit is a powerful and well-designed tool, but it's not for everyone. It successfully captures the high-energy aesthetic of the extreme sports niche and provides a comprehensive set of templates that go far beyond a simple homepage.
The Pros:
- Massive Time-Saver: For a freelance developer or a small agency, this kit can easily shave 20-30 hours off a project build. The design, layout, and responsiveness work is 90% done for you.
- Strong, Cohesive Design: The aesthetic is on-point and consistent across all templates, providing a professional and authentic look.
- Leverages Elementor Pro: It correctly utilizes the best features of Elementor Pro, like the Theme Builder and Global Styles, which is the proper way to build a modern Elementor site.
The Cons:
- Elementor Pro is a Must: The reliance on Elementor Pro is a significant hidden cost if the user was expecting a "free" solution.
- Performance Requires Work: It is not a top-performing setup out of the box. A developer with optimization knowledge is required to make it truly fast.
- Design Can Be Rigid: If you're not comfortable digging into Elementor's settings, the asymmetrical designs can be difficult to manage with your own content.
My Recommendation
So, is it worth it? Yes, but for the right audience. For a freelance developer building a site for a skate shop, this kit is a home run. It provides incredible value and a huge head start. For a small business owner who wants to DIY their site, it's a maybe. You need to be comfortable with the WordPress/Elementor ecosystem and be willing to learn about the Theme Builder and optimization. It's not a one-click solution.
The value proposition of getting a kit like this from a provider like gplpal is undeniable, especially when compared to hiring a designer to create these assets from scratch. It occupies a fantastic middle ground, offering a custom look without the custom price tag. If you're diving into the world of WordPress development, exploring the vast libraries of tools and even looking for an occasional Free download WordPress themes can be a great way to learn, but when a client project demands speed and a specific aesthetic, a premium, well-constructed kit like Skatehouse is an invaluable asset in a developer's toolkit.