Categories
Tags
Archives
Learnism: A Deep Dive into the Professional Online Courses Elem
-
Learnism: A Deep Dive into the Professional Online Courses Elementor Template Kit
Building an online course platform demands more than just content; it requires a robust, intuitive, and aesthetically pleasing digital storefront. For many educators and institutions navigating the WordPress ecosystem, Elementor template kits offer a compelling shortcut. Today, we're dissecting one such offering: Learnism - Professional Online Courses Elementor Template Kit. This review, from the perspective of a seasoned web developer and technical journalist, will peel back the layers of this kit, evaluate its technical underpinnings, assess its practical utility, and provide a comprehensive installation guide.
Initial Impressions: Targeting the Modern Edu-Preneur
Upon first inspection, Learnism positions itself squarely within the modern e-learning landscape. The design language is clean, contemporary, and professional, eschewing the flashy gradients and cluttered layouts that plague some older templates. Its visual cues suggest a target audience ranging from individual subject matter experts looking to monetize their knowledge to smaller educational institutions seeking a polished, scalable online presence without the significant investment in custom development.
The kit promises a rapid deployment solution for course websites, emphasizing Elementor's drag-and-drop flexibility. This immediately flags two critical considerations: the inherent reliance on Elementor Pro (a common, almost mandatory, dependency for advanced kits) and the implied need for a robust Learning Management System (LMS) plugin to handle the actual course delivery, user registration, and progress tracking functionalities. While Learnism provides the "skin," the operational "organs" will need to be supplied by other plugins, a fact often understated in marketing materials but crucial for real-world implementation.
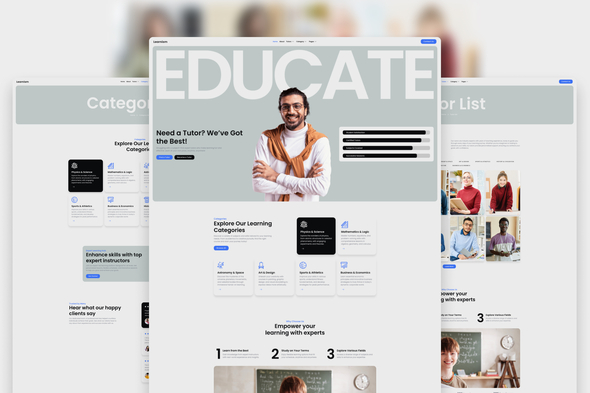
Design & Feature Set: A Comprehensive Layout Collection
Learnism comes with a commendable array of templates, covering the essential pages for an online course platform. Expect to find meticulously designed layouts for:
- Homepage Variations: Typically, a few options showcasing different hero sections, course listings, instructor highlights, and calls to action. These often feature engaging visual elements and clear navigation points.
- Courses Page: A catalog-style display, likely with filtering and search capabilities (though these functional elements would be driven by the underlying LMS plugin, with Learnism providing the visual structure).
- Course Detail Page: The critical sales page for each course, offering sections for curriculum outlines, instructor bios, testimonials, pricing, and enrollment buttons. This is where the kit's ability to present complex information clearly is tested.
- Instructor Pages: Dedicated profiles for faculty members, often including their courses, qualifications, and contact information.
- About Us/Contact Us: Standard informational pages, often featuring team sections, mission statements, and contact forms (requiring a contact form plugin).
- Blog/News: A blog section is almost universally expected, allowing for content marketing and community engagement.
- Headers & Footers: Globally applicable sections designed for consistent branding and navigation. These are crucial for a cohesive user experience.
- Pop-ups & Global Blocks: Reusable sections for calls to action, announcements, or subscription forms.
From a design perspective, the kit adheres to contemporary web standards. Typography is legible, color palettes are professional and often customizable, and the use of white space is effective in preventing visual clutter. Responsiveness is a given with modern Elementor kits, and Learnism generally handles various screen sizes well, delivering a consistent experience across desktop, tablet, and mobile devices. However, the true test of responsiveness often lies in how complex elements (like multi-column course grids or detailed curriculum sections) adapt, and this can sometimes require minor manual adjustments post-import.
Technical Deep Dive: Under the Elementor Hood
As an Elementor template kit, Learnism's technical foundation is largely dictated by Elementor itself. This implies a certain level of reliance on Elementor's DOM structure and CSS output. While Elementor has made strides in performance optimization, any kit, by its nature, adds layers of elements and styles. The quality of a kit, then, is often measured by its efficiency and maintainability:
- Code Structure: Elementor kits primarily consist of JSON files defining widget settings and page structures. The "code quality" here translates to clean, semantic use of Elementor widgets, avoiding excessive nesting where simpler solutions suffice. Overly complex structures can lead to bloated HTML and harder-to-override styles.
- Performance Considerations: A common pitfall with any highly visual Elementor design is performance. The kit itself doesn't directly dictate server response times or core web vitals, but its assets (images, fonts) and the number of Elementor widgets used per page contribute significantly. High-resolution images embedded directly, extensive use of animations, or custom CSS with inefficient selectors can slow down page loads. A good kit provides placeholders for optimized images and relies on Elementor's built-in performance features where possible. Users implementing Learnism should be prepared for proper image optimization, lazy loading, and potentially caching solutions.
- Flexibility and Customization: Learnism leverages Elementor's Global Styles, allowing for quick changes to typography, colors, and button styles across the entire site. This is a powerful feature for maintaining brand consistency. However, for significant deviations from the pre-designed layouts, users will need a solid understanding of Elementor's capabilities and potentially custom CSS. The kit provides a starting point, but bespoke functionality or highly unique layouts will still require design and development effort. It's not a magic bullet for every conceivable design requirement.
- Dependencies & Compatibility: The primary dependency is Elementor and Elementor Pro. Beyond that, the "online courses" aspect almost certainly necessitates integration with an LMS plugin. While Learnism itself won't directly integrate with a specific LMS (it's a visual layer), its success hinges on how seamlessly its templates can be adapted to display content from popular LMS plugins like LearnPress, LearnDash, Sensei, or even custom post types configured for courses. This often involves using Elementor's dynamic tags or theme builder features to pull in LMS-generated content into the kit's layouts. This is where a senior web developer's expertise becomes invaluable, bridging the gap between design and functionality.
User Experience (UX) Review: Beyond the Visuals
A good design can be undermined by poor user experience. Learnism, in its template form, provides the skeletal structure for good UX. The layouts are intuitive, guiding the user through course discovery, detail exploration, and the enrollment funnel. Key UX considerations:
- Navigation: The provided header and footer templates offer clear navigation paths, typically including links to courses, about us, contact, and perhaps a user dashboard or login. The hierarchical structure for courses is crucial.
- Information Clarity: Course detail pages, a cornerstone of an e-learning platform, generally present information in digestible blocks: overview, curriculum, instructor, reviews, pricing. This structured approach aids comprehension.
- Conversion Pathways: Enrollment buttons are prominent and strategically placed. The flow from course interest to enrollment needs to be friction-less. The kit provides the visual triggers, but the actual conversion process is handled by the LMS and payment gateway.
- Accessibility: While Elementor and its kits generally adhere to basic accessibility standards, a deeper audit for color contrast, keyboard navigation, and ARIA attributes often requires manual review and adjustment. The kit provides a good baseline, but it's not a complete accessibility solution out of the box.
Installation Guide: Bringing Learnism to Life
Implementing an Elementor template kit like Learnism requires a methodical approach. This guide assumes you have a functional WordPress installation and basic familiarity with its dashboard. You'll likely acquire such a kit from a platform like gplpal, which provides access to premium themes and plugins.
Prerequisites: The Essential Toolkit
- WordPress Installation: A clean or existing WordPress installation (self-hosted or managed hosting). Ensure your PHP version is 7.4 or higher, and WordPress is up to date.
- Elementor Plugin: Install and activate the free Elementor plugin from the WordPress Plugin Repository.
- Elementor Pro Plugin: Crucial. Learnism is built with Elementor Pro features, including Global Styles, Theme Builder elements, and advanced widgets. Install and activate Elementor Pro. Ensure your Elementor Pro license is active for full functionality and updates.
- Hello Elementor Theme (Recommended): While not strictly mandatory, the lightweight Hello Elementor theme is highly recommended as a base for Elementor kits, as it provides a blank canvas optimized for Elementor's Theme Builder. Alternatively, ensure your current theme does not impose conflicting styles that might override the kit.
- LMS Plugin (Future Integration): For actual course functionality, plan to install an LMS plugin (e.g., LearnPress, LearnDash, Sensei, Tutor LMS). While not needed for the *kit import*, it's essential for the complete website.
- Contact Form Plugin: If the kit includes contact forms, you'll need a plugin like WPForms, Contact Form 7, or Fluent Forms.
Step-by-Step Installation Process
Step 1: Download the Learnism Kit
Once you've obtained the "Learnism - Professional Online Courses Elementor Template Kit" (typically a
.zipfile), save it to your local computer. Do not unzip this file.Step 2: Install Elementor & Elementor Pro
- Navigate to your WordPress Dashboard > Plugins > Add New.
- Search for "Elementor" and click "Install Now," then "Activate."
- For Elementor Pro, upload the plugin file you acquired (Plugins > Add New > Upload Plugin), install, and activate it.
- Go to Elementor > License and activate your Elementor Pro license.
Step 3: Install the "Envato Elements" Plugin (If Applicable)
Some Elementor Template Kits are designed to be imported via the "Envato Elements" plugin. If your kit download includes instructions to use this plugin, or if you acquired it directly from Envato, install and activate the "Envato Elements" plugin from the WordPress Plugin Repository. Then, navigate to Elements > Installed Kits and follow the prompts to upload and install your kit. For kits obtained from other sources, the standard Elementor Import process is typically used.
Step 4: Import the Template Kit via Elementor Tools
This is the most common method for standalone Elementor template kits:
- From your WordPress Dashboard, go to Elementor > Tools.
- Select the "Import / Export Kit" tab.
- Under "Import Template Kit," click the "Start Import" button.
- Drag and drop your
Learnism.zipfile (or whatever the kit's zip file is named) into the upload area, or click to select the file. - Elementor will then analyze the kit. You'll see a screen listing all the components of the kit (Site Settings, Templates, Content, etc.). Review the items.
- Click "Import". This process can take a few minutes as Elementor imports global styles, fonts, color palettes, and all the individual page and section templates.
- Once complete, you'll usually get a "Kit Imported Successfully!" message.
Step 5: Review Global Settings & Content
After import, it's critical to check the global settings:
- Go to any page and click "Edit with Elementor."
- Click the hamburger icon (three lines) in the top-left corner of the Elementor editor to open the Elementor Panel.
- Select "Site Settings."
- Review and adjust the imported Global Colors, Global Fonts, Typography, and Button settings to match your branding. While the kit imports these, you might want to fine-tune them.
- Under "Theme Builder," verify that the imported Header and Footer templates are assigned correctly to "Entire Site."
Step 6: Import Individual Page Templates & Build Your Site
The kit import brings in the raw templates, but you still need to create WordPress pages and populate them with these templates:
- Go to your WordPress Dashboard > Pages > Add New.
- Give your page a title (e.g., "Home," "Courses," "About Us").
- Click "Edit with Elementor."
- Inside the Elementor editor, click the gray "Folder" icon (Template Library) to open it.
- Go to the "My Templates" tab. You should see all the Learnism page templates listed here (e.g., "Learnism Home Page 1," "Learnism Courses," etc.).
- Hover over the desired template and click "Insert."
- Confirm you want to import the Document Settings.
- Once the template loads, save your page. Repeat this process for all the core pages of your website.
Step 7: Configure Menus
With your pages created, set up your navigation:
- Go to WordPress Dashboard > Appearance > Menus.
- Create a new menu (e.g., "Main Menu").
- Add the pages you just created (Home, Courses, About, Contact) to the menu.
- Assign this menu to the primary navigation location (usually "Header" or "Primary").
Step 8: Set Your Homepage
- Go to WordPress Dashboard > Settings > Reading.
- Under "Your homepage displays," select "A static page."
- Choose your newly created "Home" page from the "Homepage" dropdown.
- If you plan to use the kit's blog, also select a page for your "Posts page" (e.g., "Blog").
Step 9: Permalink Structure
Ensure your permalinks are SEO-friendly:
- Go to WordPress Dashboard > Settings > Permalinks.
- Select "Post name" for a clean URL structure.
- Save Changes.
Step 10: Content Population & Customization
This is where the real work begins. The kit provides placeholder content. You need to:
- Replace Text: Update all headings, paragraphs, and calls to action with your actual course descriptions, company information, etc.
- Update Images: Replace placeholder images with your high-quality, optimized course thumbnails, instructor photos, and branding visuals. Ensure images are properly sized and compressed for web performance.
- Link Adjustment: Update all internal and external links to point to your actual pages, courses, and social media profiles.
- LMS Integration: This is the most complex part. If you've installed an LMS plugin, you'll need to figure out how to display its course listings and individual course content using Learnism's layouts. This often involves using Elementor's Post widgets, dynamic content features, or shortcodes provided by your LMS to populate the kit's structures. For example, you might create a custom single course template in Elementor's Theme Builder and populate it with LMS-specific fields using dynamic tags.
- Form Configuration: If contact forms or subscription forms are included, link them to your chosen contact form plugin and configure their settings.
- Test Thoroughly: Check all pages, links, forms, and responsiveness across different devices.
Troubleshooting Common Issues
- Import Errors: If the kit fails to import, ensure your WordPress memory limits are sufficient (check
wp-config.phpfordefine('WP_MEMORY_LIMIT', '256M');or higher). Also, check your server's upload file size limit. - Missing Images/Icons: After import, some images or icons might appear broken. Ensure Elementor is updated, and clear any caching plugins. Re-uploading specific images might be necessary.
- Style Conflicts: If your active theme has strong styling, it might conflict with the kit. Consider switching to Hello Elementor. You may need to use Elementor's "Container" or "Section" settings to disable theme styles or apply custom CSS to override conflicts.
- Elementor Pro Not Active: Many kit features won't work without an active Elementor Pro license. Double-check its activation.
Strengths of Learnism
- Modern Aesthetics: Clean, professional, and visually appealing design that resonates with contemporary e-learning platforms.
- Comprehensive Page Coverage: Provides a solid foundation with most essential pages for an online course website.
- Elementor Flexibility: Leverages Elementor Pro's capabilities for global styling and easy drag-and-drop customization, reducing development time significantly.
- Good Starting Point: For those who appreciate a well-designed blueprint, Learnism offers a robust and structured beginning.
Weaknesses and Areas for Improvement
- Generic LMS Integration: As a template kit, it provides the visual shell but no inherent LMS integration. The burden of connecting the design with dynamic course content from an LMS plugin falls entirely on the user, requiring a deeper understanding of Elementor's dynamic features and the chosen LMS. This is a common limitation of kits, but it's important for users to understand this distinction.
- Potential for Bloat: Like any highly stylized Elementor creation, careless content population (e.g., unoptimized images, excessive animations) can lead to performance degradation if not managed actively.
- Reliance on Elementor Pro: While expected, it's an additional cost and dependency that needs to be factored in. The kit is unusable without it.
- Content Replacement Overhead: While easy to customize, the sheer volume of placeholder text and images across numerous pages means significant manual content input is still required.
Verdict and Recommendation
Learnism - Professional Online Courses Elementor Template Kit is a valuable asset for individuals and small to medium-sized educational entities aiming to launch a visually appealing online learning platform quickly. Its strength lies in its polished design and its comprehensive suite of page layouts, providing a robust visual framework. It significantly reduces the initial design and frontend development workload, making it an excellent choice for those who are proficient with Elementor and prefer a structured starting point over a blank canvas.
However, prospective users must approach Learnism with a clear understanding of its limitations. It is a design kit, not a full-fledged LMS. The real technical challenge and time investment will come in integrating the kit's visuals with the dynamic content and functionality provided by an LMS plugin (e.g., managing courses, user enrollments, quizzes, certifications). Developers comfortable with Elementor's Theme Builder and dynamic tags will find it a powerful tool for this integration. Those new to Elementor or WordPress development might find the LMS integration step daunting.
Overall, Learnism offers high value for its intended purpose. It delivers on its promise of professional design for online courses, provided the user is prepared to bridge the gap between aesthetics and functionality with a suitable LMS and a thoughtful content strategy. For those seeking other resources or a broader selection of solutions, exploring platforms offering Free download WordPress themes can also yield suitable alternatives or complementary tools.