Categories
Tags
-
#Image & Video FullScreen Background WordPress Plugin: A Developer's Deep Dive & Technical Review Creating an immersive first impression on a website often comes down to visuals. While clean
#minimalist designs have their place
#sometimes you need to hit the user with a full-blast
#edge-to-edge visual statement. This is where full-screen backgrounds come into play. They can set a mood
#showcase a product
#or create a cinematic experience that static layouts simply can't match. The challenge
#however
#has always been implementation. Wrestling with CSS
#ensuring responsiveness
#and fighting theme conflicts can turn a simple design idea into a development nightmare. This is the problem the Image&Video FullScreen Background WordPress Plugin aims to solve. In this technical review and guide
Archives
Housebuild Joomla Theme: A Developer's Deep-Dive Review and Ins
-
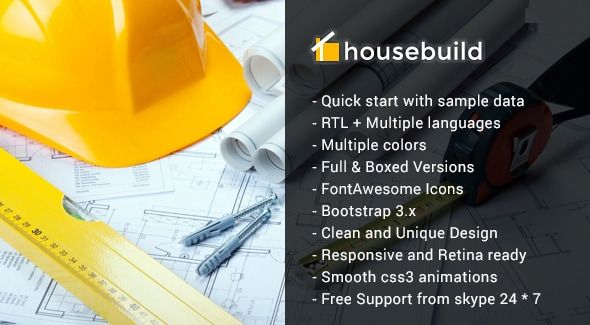
Housebuild Joomla Theme: A Developer's Deep-Dive Review and Installation Guide
Finding a competent, purpose-built theme for a niche industry in the Joomla ecosystem can feel like prospecting for gold. You sift through countless generic business templates, hoping to find something with the right structure and aesthetic that won’t require a complete teardown and rebuild. The construction industry has specific digital needs: bold project showcases, clear service listings, and prominent calls-to-action for quotes and consultations. This is the exact problem the Housebuild - Joomla Construction Business Theme aims to solve. But does it lay a solid foundation for a professional web presence, or are there cracks in the facade? As a developer who has navigated the good, the bad, and the bloated of Joomla templates, I’m going to break this theme down piece by piece. This isn't just a feature list; it's a technical review and a practical, real-world installation guide to determine if Housebuild is the right tool for the job.
Part 1: The Technical Review - A Developer's Perspective
Before we even get to installation, we need to inspect the blueprints. A theme is more than just its demo content; it's an architectural decision that impacts performance, security, and future scalability. Let's get under the hood of Housebuild.
First Impressions & Design Philosophy
Out of the box, Housebuild presents a confident, if conventional, aesthetic for the construction sector. It employs a strong, high-contrast color palette (typically yellows, blacks, and whites), bold sans-serif typography, and ample space for high-impact imagery of completed projects. The visual hierarchy is straightforward and effective. The top of the fold immediately presents the company's value proposition and a "Get a Quote" button, which is precisely what a potential client needs to see.
The user experience (UX) design follows a well-trodden path for service-based businesses. The navigation is logical, guiding users through key sections like Services, Projects, About Us, and Contact. There are no clever-for-the-sake-of-clever design choices here, which is a significant plus. A contractor's website needs to be a tool for generating leads, not an art project. Housebuild understands this, focusing on clarity and conversion. However, the design does feel characteristic of a specific era of web design—heavily reliant on full-width image banners and icon-plus-text service blocks. It's clean and professional, but it won't win any avant-garde design awards. For its target audience, that’s perfectly fine.
The Framework and Dependencies: SP Page Builder at the Core
Housebuild is built upon two critical pieces of technology from the JoomShaper ecosystem: the Helix Ultimate Framework and the SP Page Builder Pro component. This is a crucial detail that defines the entire experience of using and developing with this theme.
- Helix Ultimate Framework: This is the template's skeleton. Helix is a mature and powerful framework that provides the core layout management, typography controls, responsive grid system, and customization options through its template administrator interface. Its strengths are a logical backend panel, robust layout builder for module positions, and decent control over presets and styling. It’s a solid, reliable choice.
- SP Page Builder Pro: This is the muscle. The vast majority of the content you see in the demo—the complex rows, columns, sliders, and interactive elements—is not built with standard Joomla articles and modules. It's constructed visually within SP Page Builder.
This reliance on a page builder is a double-edged sword.
The Upside: For business owners or junior developers, it offers incredible speed and flexibility. You can drag and drop addons, adjust spacing, and build complex layouts without writing a single line of code. It empowers the end-user to manage their own content, which is a huge selling point. The "what you see is what you get" frontend editing is intuitive and significantly lowers the barrier to entry.
The Downside (The Developer's Gripe): This creates a significant dependency lock-in. Your content's structure and styling become intertwined with SP Page Builder's shortcode-like system. If you ever decide to move away from SP Page Builder, migrating this content is a painful, manual process of extracting raw HTML from a mess of proprietary tags. Furthermore, page builders, by their very nature, can introduce code bloat. Every addon, row, and column setting adds divs and CSS classes, potentially leading to a heavier DOM and more CSS to parse, which brings us to performance.
Code Quality and Customization
A theme's long-term value is determined by how easily a developer can extend and customize it. Housebuild, by virtue of using the Helix framework, gets a passing grade here. Helix has a well-documented system for template overrides. You can easily override the output of core Joomla components (like `com_content`) or modules by copying their view files into the theme's `html` directory. This is standard Joomla best practice, and it’s good to see it respected.
The CSS situation is more complex. While you can add your own custom CSS via the template options, modifying the core theme styling requires understanding how Helix and SP Page Builder compile their styles. Often, you'll find yourself writing more specific, and sometimes more forceful (`!important`), CSS rules to override the page builder's inline or heavily specified styles. It's manageable, but not as clean as working with a theme built with a pure SASS/LESS workflow without a page builder's interference.
Responsiveness is handled competently by the underlying Bootstrap grid within Helix. The layouts adapt well to tablets and mobile devices. However, it's more of a "collapsing" responsive design than a truly "mobile-first" one. The desktop view is clearly the primary design, and smaller screens are an adaptation of that. For this business type, where many initial inquiries might come from desktop research, this is an acceptable compromise.
Performance Analysis: The Page Builder Penalty
Let's be blunt: any site built heavily with a page builder will struggle to be a top performance performer without significant optimization. Housebuild is no exception. A default installation, with all the demo content and high-resolution images, will likely not score well on Google's Core Web Vitals out of the box.
Common culprits include:
- HTTP Requests: SP Page Builder and its addons load their own CSS and JavaScript files, in addition to those from Joomla core, the Helix framework, and other installed modules. This can lead to a high number of requests.
- CSS/JS Bloat: You might be loading the CSS for a carousel addon on a page that doesn't even have a carousel. This unused code adds to the page weight.
- Large Images: The demo is packed with beautiful but often unoptimized hero images. These are a primary cause of slow Largest Contentful Paint (LCP) times.
However, this is not a death sentence. A skilled developer can mitigate these issues. The first steps are always:
- Aggressive Caching: Enable Joomla's built-in page caching and Gzip compression.
- Optimization Extension: Install and configure a tool like JCH Optimize. This extension is brilliant at combining, minifying, and deferring CSS and JavaScript files, drastically reducing HTTP requests and blocking rendering time.
- Image Optimization: Manually compress all images before uploading using a tool like Squoosh, or use an extension that optimizes images on the fly. Convert key images to next-gen formats like WebP.
With these measures, a Housebuild site can be made to perform reasonably well. But you must be proactive; high performance is not something you get for free here.
Part 2: The Installation & Configuration Guide
Now for the practical application. You've reviewed the plans and decided to break ground. There are two primary methods for installing the Housebuild theme: the Quickstart package and the manual installation. For 99% of new projects, the Quickstart is the only sane choice.
Prerequisites
Before you download anything, ensure your hosting environment is ready. You'll need:
- A standard LAMP/Litespeed server (Linux, Apache/Litespeed, MySQL, PHP).
- PHP 7.4 or higher (check the theme's documentation for specific version compatibility, especially for Joomla 4).
- MySQL 5.6+ or MariaDB 10.1+.
- A clean database with a user and password ready.
- FTP/SFTP or cPanel File Manager access to your server.
Step 1: The Quickstart Installation (The Recommended Path)
The Quickstart package is a complete Joomla installation bundled with the theme, extensions, and all the demo content. It's designed to replicate the live demo on your server in minutes.
- Download and Upload: Download the Quickstart ZIP file (it will be a large file, likely 100MB+). Upload this single ZIP file to the root directory of your website (e.g., `public_html`).
- Extract: Using your hosting control panel's File Manager, extract the contents of the ZIP file. This will unpack the entire Joomla file structure.
- Create a Database: In your hosting control panel, go to the MySQL Databases section. Create a new database, a new database user, and assign that user to the database with full permissions. Write down the database name, username, and password. You will need them in the next step.
- Run the Joomla Installer: Open your web browser and navigate to your domain name (e.g., `http://www.yourconstructioncompany.com`). You will be automatically redirected to the Joomla installation wizard.
- Follow the Wizard:
- Main Configuration: Fill in your site name, a description, and your administrator account details (username, password, email). Use a strong password.
- Database Configuration: This is the critical step. Enter the database name, username, and password you created in the previous step. The hostname is usually `localhost`, but check with your hosting provider.
- Finalisation / Overview: This is where the Quickstart differs from a standard Joomla install. You will see an option to install sample data. It will likely be pre-selected and might be named "Default English (GB) Sample Data" or something similar related to the theme. DO NOT CHANGE THIS. This option tells the installer to install all the demo content, modules, and configurations. Click "Install".
- Clean Up: After the installation finishes, you will be prompted to remove the `installation` directory. This is a crucial security step. Click the button to remove it.
- Verify: Navigate to your domain's front end. It should look identical to the Housebuild theme demo. Log in to the administrator backend (yourdomain.com/administrator) to confirm everything is working.
Step 2: Manual Installation (For Experts on Existing Sites)
This path is for developers who need to add the Housebuild theme to an already existing Joomla site with content. Be warned: this is a tedious and complex process, as you have to manually configure everything the Quickstart does automatically.
- Backup Your Site: Before you begin, take a complete backup of your site's files and database. Do not skip this.
- Install the Components:
- Download the individual extension packages that come with the theme.
- Install the SP Page Builder Pro component first through the Joomla Extension Manager.
- Install any other required components or plugins (e.g., SP Simple Portfolio).
- Install the Theme: Install the `tpl_housebuild` package via the Extension Manager. Go to System -> Site Template Styles and set Housebuild as your default template for the site.
- Install Modules: Manually install all the module packages that came with the theme.
- Configure and Assign: This is the hardest part. You now have to go through each module, assign it to the correct template position (e.g., `logo`, `menu`, `bottom1`), and configure its settings to match the demo. You'll also need to assign modules to specific menu items to control where they appear. This requires a deep understanding of the Joomla module system and a lot of cross-referencing with the theme's demo site.
- Import Pages: If the theme provides a JSON export of the SP Page Builder pages, you can use the SP Page Builder import function to add the demo pages. If not, you will have to rebuild key pages like the homepage from scratch using the page builder interface.
As you can see, the manual path is fraught with potential issues and is incredibly time-consuming. It's a task best left to seasoned Joomla developers.
Step 3: Core Configuration and Branding
Once your site is installed (via Quickstart), the real work of branding begins. All of this is done in the template's options.
- Navigate to System -> Site Template Styles and click on the `shaper_housebuild - Default` style.
- Basic Settings: In the "Basic" tab, upload your company's logo for desktop, mobile, and retina screens. You can also configure the favicon here.
- Layout Builder: This is where you can adjust the module position grid. For most users, the default layout will be sufficient.
- Typography: Change the body font, heading fonts, and font weights to match your company's brand guidelines. Be mindful of performance; don't load too many different font weights.
- Styling (Presets): The "Presets" tab is your color control panel. You can select from pre-defined color schemes or, more importantly, create your own by setting the primary, secondary, and text colors to match your brand.
- Contact & Social: In the "Basic" or a dedicated "Contact" tab, update the company's phone number, email address, and physical address. Add links to your social media profiles.
The final, critical step is to edit the demo content. Go to the SP Page Builder component and open the "Pages" view. Here you can edit the Homepage, About page, etc., replacing the placeholder text and images with your own content. For the project portfolio, you'll use the SP Simple Portfolio component to add your projects, which will then be automatically displayed by the portfolio module or page.
Final Verdict & Developer's Take
So, is Housebuild a solid structure to build on? Yes, with caveats.
This theme is an excellent choice for: Small-to-medium construction companies, general contractors, architects, and renovation specialists who need a professional, industry-specific website up and running quickly. The Quickstart package is a massive time-saver, and the SP Page Builder integration makes content updates accessible to non-technical users. The value proposition from a vendor like gplpal makes it an economically sound choice, especially when compared to a full custom build.
This theme should be avoided by: Performance purists who refuse to accept the overhead of a page builder, and large enterprises that require deep integration with custom backend systems. The dependency on SP Page Builder means you are trading some developer freedom and raw performance for speed and ease of use.
Ultimately, Housebuild delivers on its promise. It provides a robust, visually appealing, and functionally complete website blueprint for a construction business. While the Joomla world might not have the sheer volume of options seen in the market for Free download WordPress themes, specialized products like Housebuild prove that quality and focus are available if you know where to look. Its foundation is solid, but be prepared to perform your own site optimization to ensure the finished structure is not just beautiful, but also fast and efficient.