Resto Elementor Pro Kit: A Developer's Hands-On Review and Deep
-
Resto Elementor Pro Kit: A Developer's Hands-On Review and Deep-Dive Installation Guide
Let's be direct. Building a website for a restaurant should be a straightforward job, but it often descends into a unique kind of chaos. You're wrestling with clunky menu plugins, trying to shoehorn a reservations system into a generic corporate theme, and explaining to a chef why their beautifully photographed dishes look pixelated on a template not built for high-impact visuals. It's a niche that demands a specific toolset. This is the exact problem that template kits aim to solve, and today we're putting one under the microscope: the Resto - Restaurant Catering & Cafe Elementor Pro Template Kit. My goal here isn't to rehash the sales page. It's to install it, dissect its structure, and give you a senior developer's take on whether it's a solid foundation for a client project or just a pretty facade that will crumble under pressure.
We're going to treat this not as a simple theme, but as a full-stack design system for Elementor. We'll cover the installation process with the precision it deserves, highlighting the potential pitfalls. Then, we’ll critique the design choices, dig into the template structure, and evaluate its real-world performance and customizability. Is this kit a time-saver that lets you focus on higher-value tasks, or is it a shortcut that will cost you more time in cleanup and client support down the line? Let's find out.
Part 1: The First Impression and What's in the Box
Upon acquiring the kit, you get a single ZIP file. No fluff, no 50-page PDF guides, just the core components. Unpacking it reveals the raw materials of your future website: a collection of JSON files and a manifest file. For anyone new to Elementor Kits, this is the standard. Each JSON file represents a piece of the site.
Unpacking the Kit's Contents
Inside the `resto-elementor-pro-kit` folder, you'll typically find the following structure:
- Core Templates: `header.json`, `footer.json`, `archive.json`, `single-post.json`. These are the theme builder parts that create the global shell of your site.
- Page Templates: `home.json`, `about-us.json`, `menu.json`, `our-chefs.json`, `contact.json`, `gallery.json`. These are the full-page layouts you'll import.
- Global Kit Settings: `kit-settings.json`. This is the heart of the kit. It contains all the global styles—colors, fonts, button styles, form field settings, and more. This is what promises design consistency.
- Manifest File: `manifest.json`. This file tells Elementor which plugins the kit requires to function correctly. A crucial piece of the puzzle for a smooth setup.
The manifest for Resto is clean, primarily calling for Elementor and Elementor Pro. This is a good sign. Overly complex kits that require a dozen third-party plugins are often a red flag for code bloat and potential future conflicts or licensing headaches.
Design and Aesthetic Analysis
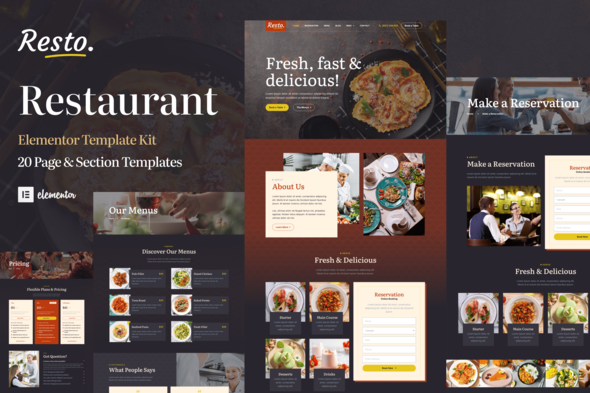
Now for the subjective part: the look and feel. Resto aims for a modern, slightly upscale-casual vibe. It's not stuffy Michelin-star territory, nor is it a greasy spoon diner template. It sits comfortably in the "premium bistro, artisan cafe, or professional catering" space.
Typography: The font pairing is competent. It uses a clean, readable sans-serif for body copy and UI elements, paired with a more stylized, elegant serif for headings. This classic combination works well for the restaurant industry, conveying both professionalism and a touch of class. The typographic scale is generally well-considered, creating clear visual hierarchy on each page.
Color Palette: The default palette is earthy and dark, relying on deep charcoals, warm wood tones, and gold/mustard accents. It's an effective choice for creating a cozy, evening dining atmosphere. Crucially, the colors are implemented through Elementor's Global Colors. This is a massive plus. It means rebranding the entire site to match a client's logo and interior design should be a matter of changing a few hex codes in one place, not hunting down individual widget styles on 10 different pages. We'll test this claim later.
Layout and Imagery: The layouts make excellent use of large, immersive background images and well-composed image blocks. This is vital for a restaurant site, where food photography does most of the selling. The design incorporates a good mix of grid layouts, asymmetrical arrangements, and generous white space (or, in this dark theme, "dark space"). It feels professional and intentionally designed, avoiding the generic, stacked-block look of more basic templates.
Part 2: The Installation Gauntlet: A Step-by-Step Guide
A template kit is only as good as its installation process. A messy import can sour the entire project from the start. Let's walk through the process, developer to developer, with an eye for the details that matter.
Prerequisites: The Non-Negotiables
Before you even think about uploading the kit, ensure your environment is ready. This will save you from 90% of common import errors.
- A Clean WordPress Installation: Do not try to import this kit over an existing site with content and a different theme. You're asking for a world of conflicting styles and settings. Start with a fresh WordPress install on a development or staging server.
- Elementor (Free): Install the latest version from the WordPress repository.
- Elementor Pro: This is an "Elementor Pro Template Kit." It will not work without it. The header, footer, and several dynamic widgets rely on Pro features. Make sure your Elementor Pro license is active on the site.
- PHP Server Settings: This is where many people get stuck. A full kit import can be a resource-intensive process. Check your server's PHP configuration and ensure you have at least the following:
- `memory_limit` = 256M or 512M
- `upload_max_filesize` = 64M
- `post_max_size` = 64M
Step-by-Step Import Process
With the prep work done, the actual import is managed entirely through Elementor's interface.
Step 1: Navigate to the Kit Library
In your WordPress dashboard, go toElementor > Tools. Click on the "Import / Export Kit" tab.Step 2: Upload the Kit ZIP File
Click the "Start Import" button. You'll be prompted to select a file. Choose the main `resto-elementor-pro-kit.zip` file you downloaded. Do not unzip it first. Upload the entire archive.Step 3: The Import Wizard
Elementor will read the `manifest.json` file and show you which components it's about to import. You'll see a checklist of Templates, Content (like pages and posts), and Site Settings. By default, everything is selected. For a fresh site, this is what you want. Click "Next".Elementor will then check for plugin dependencies. It will see that it needs Elementor Pro (which you should already have installed and activated). If any other plugins were required, it would list them here.
Step 4: The Import
Click "Import". Now, be patient. Elementor is creating all the templates, applying the global site settings, and building the pages. This can take a minute or two. Do not navigate away from the page. Once it's complete, you'll get a success screen with a summary of what was imported.Post-Import Checklist & Common "Gotchas"
The import is done, but your work isn't. The site is assembled, but it's not "live."
- Check Header and Footer: Go to
Templates > Theme Builder. You should see the imported Header and Footer. Check their Display Conditions. Sometimes, you may need to manually ensure the header is set to "Entire Site" and the footer is as well. The kit *should* do this, but it's the first thing to verify. - Set Your Homepage: Go to
Settings > Readingin the WordPress dashboard. Set your "Homepage" to the newly created "Home" page. - Check Your Menu: Go to
Appearance > Menus. The importer may or may not create a menu for you. If not, create a new menu, add the pages the kit created (Home, About, Menu, etc.), and assign it to the "Primary Menu" location used by your header template. You can find the location name in the Header template's "Nav Menu" widget settings. - The "Unsynced Global Colors" Bug: Occasionally, after an import, you might edit a page and find that some elements are not using the new global colors. A quick fix is to go to
Elementor > Tools > Regenerate CSS & Data. This forces Elementor to rebuild its stylesheets based on the new global settings and usually resolves any sync issues.
Part 3: Under the Hood — A Developer's Critique
The site looks good on the front end. But as developers, we care about what's underneath. Is the structure clean and maintainable, or is it a mess of nested sections and inline styling that will become a nightmare to manage?
Template Structure Breakdown
I dove into the Elementor editor for the key templates to assess their build quality.
Homepage (`home.json`): The homepage is complex, as expected. It's built using a mix of containers (if you have the feature enabled) or the older section/column structure. The good news is that the structure is logical. There's a clear hierarchy of parent containers for each major section (Hero, About Us snippet, Menu highlights, Testimonials). The nesting depth is reasonable—I didn't find any egregious "container-in-a-container-in-a-container" anti-patterns. The use of widgets is also smart. Instead of creating static text for testimonials, it uses a carousel widget, which is easier for a client to update. The "special of the day" section is just a standard text and image box, which is a bit of a missed opportunity. A more advanced setup might have used a custom post type or a dynamic tag to pull this content, making it easier for a client to change without ever opening Elementor.
Menu Page (`menu.json`): This is the most critical page for any restaurant. Resto's approach is aesthetically pleasing but has a significant drawback from a client-management perspective. The menu is built with a series of "Icon Box" or "Image Box" widgets, manually laid out. Each menu item (name, description, price) is just static text typed into a widget.
- The Pro: You have absolute pixel-perfect control over the design.
- The Con: A restaurant owner will have to open Elementor and navigate a complex layout just to change a price or add a new dish. This is not ideal. For a real client project, I would immediately rebuild this page using a Loop Grid powered by a custom post type (e.g., "Menu Items"). This way, the client can add, edit, and remove dishes from the familiar WordPress backend, and the Loop Grid on the front end automatically updates the layout. The Resto menu page serves as an excellent *design reference*, but not as a practical, client-proof *system*.
Responsiveness and Performance
I resized my browser from 4K down to a 360px mobile view. The responsiveness is solid. The breakpoints are well-managed, and the content reflows logically. The mobile menu (a Pro feature) works as expected. The only minor issue I found was a bit of awkward text wrapping on a heading at a specific tablet width, an easy fix by adjusting the font size for that breakpoint. Overall, the responsive implementation is professional.
Performance is the elephant in the room with any complex Elementor site. The Resto kit, by itself, is not inherently slow. However, it encourages the use of large background images and multiple sections. Without proper optimization, a site built with this kit could become heavy. A developer using this kit must be diligent about:
- Image Compression: All the beautiful, high-resolution photos need to be aggressively compressed and served in a next-gen format like WebP.
- Lazy Loading: Ensure Elementor's lazy loading is active, or use a performance plugin to handle it.
- Caching: A good server-side or plugin-based caching solution is non-negotiable.
The DOM size on the homepage is on the higher side, but not outrageous for a page with this level of design complexity. It's a trade-off: visual flair for more HTML elements.
The GPL Advantage
It's worth touching on where and how you acquire these tools. Getting premium kits like Resto from a marketplace like gplpal operates under the General Public License (GPL). For a developer or a small agency, this is a game-changer. It means you can get your hands on this and hundreds of other premium tools for a fraction of the cost. It allows you to build a full-featured staging site for a client proposal without committing to expensive annual licenses for tools you might only use once. It's about having the freedom to experiment and build without the financial barrier, which is the core philosophy of the GPL that WordPress itself is built on.
Part 4: Customization and Real-World Viability
A template kit's true value is revealed when you try to make it your own. How does Resto hold up when you move beyond its default styling?
Branding and Re-skinning
This is where the kit shines, thanks to its proper use of Elementor's Site Settings. I decided to rebrand the site for a fictional, bright, airy brunch cafe.
- I went to
Site Settings > Global Colors. I changed the four primary colors: the dark background to a light cream, the text color to a dark grey, and the gold accent to a fresh teal. - Next,
Site Settings > Global Fonts. I swapped the elegant serif for a more modern, rounded sans-serif for the headings. - Finally, I uploaded a new logo via the Site Identity settings.
The result? The entire website transformed in under five minutes. The new colors and fonts were reflected across every page, every button, and every heading. This is the mark of a well-built kit. It leverages the core engine of Elementor correctly, saving hours of tedious manual overrides. There were a few spots, like a specific decorative divider, that had a hardcoded color, but these were exceptions, not the rule, and were easy to find and change.
Client Hand-off and Usability
This is the kit's weakest point, particularly concerning the menu, as discussed earlier. For a client to be truly self-sufficient, a developer would need to invest time in retrofitting key sections with more dynamic solutions.
- Menu: Rebuild with a CPT and Loop Grid.
- Specials/Events: Use a CPT or even the default Posts with a specific category ("Events") and pull them in dynamically on the homepage.
- Contact Info in Footer: Ensure this is pulled from a central options page (using a plugin like ACF) rather than being static text in the footer template.
The Resto kit provides the `design`, but a good developer needs to build the `system` that makes it easy for a client to manage. Handing over the default kit as-is would likely lead to support calls for simple content changes.
The Final Verdict
So, is the Resto Elementor Pro Template Kit a buy? It depends entirely on who you are and what you need.
Who is this kit for?
- Freelancers & Agencies: As a starting point, it's fantastic. It provides a professional, cohesive design baseline that can be rapidly customized, saving you dozens of hours on initial design and layout. You get to focus on the value-add: system architecture, client training, and custom features.
- Developers Needing a Quick Prototype: It's perfect for mocking up a high-fidelity design to show a potential client, getting quick sign-off before you build out the more complex backend systems.
Who should avoid this?
- Absolute Beginners: If you're not comfortable with the idea of rebuilding parts of it with more dynamic tools or don't understand the difference between static content and a CPT-driven loop, you might find yourself stuck with a site that's hard to update.
- Someone Needing a 100% Client-Ready Solution Out of the Box: As highlighted, it needs a developer's touch to make it truly manageable for a non-technical user.
In short, the Resto kit is a powerful accelerator, not a finished product. It delivers an excellent visual foundation and is built intelligently on Elementor's global styling engine. Its static approach to content like the menu is a drawback, but it's one that a competent developer can and should rectify. It successfully shaves off the most time-consuming part of the process—the initial design and build-out—allowing you to create a beautiful, custom restaurant website faster. For developers looking to expand their toolkit, browsing through marketplaces for Free download WordPress themes and premium kits can be an invaluable way to discover new foundations for all kinds of projects, not just restaurants.
Resto is a solid B+. It's a professional tool that, in the right hands, can be the start of an A+ client project.