Interrial Elementor Kit: A Developer's Deep Dive and No-Nonsens
-
Interrial Elementor Kit: A Developer's Deep Dive and No-Nonsense Installation Guide
Every web developer has faced this client: an interior designer, an architect, or a creative agency with an impeccable eye for visual harmony but a budget that's more flat-pack than bespoke. They need a website that reflects their high-end aesthetic, feels custom-built, and doesn't break the bank. The usual route involves weeks of custom theme development or a frustrating battle with a bloated, multi-purpose theme. This is the exact scenario where a product like the Interrial - Interior Design Service Elementor Template Kit enters the conversation. It promises a fast track to a sophisticated, portfolio-driven website. But as developers, we know promises are cheap. The real questions are: Is the foundation solid? Is it a launchpad for a custom project or a gilded cage of pre-set styles? This review will dissect Interrial from the code up, providing a critical analysis and a detailed installation guide for professionals who value their time and their clients' results.
Part 1: The Blueprint Analysis – A Critical First Look
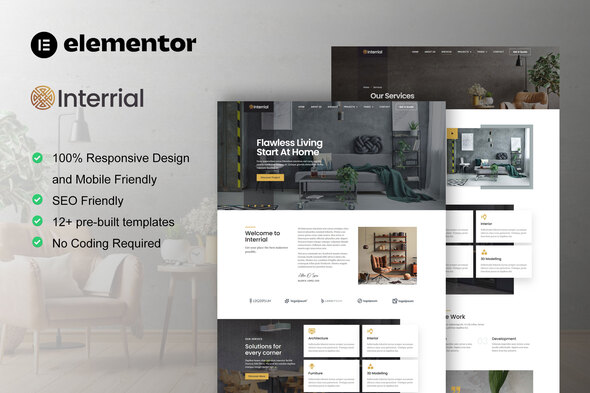
Before ever uploading a single file, a senior developer scrutinizes the demo. It's our version of inspecting the architect's blueprints. The Interrial demo presents a clean, minimalist, and distinctly modern aesthetic. It leans heavily on high-quality imagery, generous white space, and a refined, serif-based typography. This is a look that works well for the target market, conveying elegance and professionalism.
Design Language and Layout
The design is competent. It uses a conventional but effective grid system, ensuring content is legible and logically structured. The color palette is muted, typically a mix of off-whites, greys, and a single accent color, designed to let the portfolio images take center stage. This is a smart choice; the website's design shouldn't compete with the designer's work.
However, from a critical standpoint, it borders on generic. We've seen this layout before: the full-width hero with a call-to-action, the three-column feature grid, the "About Us" section with a team photo, and the portfolio gallery. While this familiarity makes the site intuitive for end-users, it lacks a unique design signature out of the box. Its strength isn't in groundbreaking innovation but in its solid, professional execution of a proven formula. For a developer, this is a double-edged sword. It's a safe and fast starting point, but it requires significant creative input to make it feel truly custom and not just another template-based site.
The Technical Foundation: An Elementor Kit
Interrial is an Elementor Template Kit, not a traditional WordPress theme. This is a crucial distinction. It doesn't control the entire site's functionality like a theme does. Instead, it's a collection of pre-designed page layouts, sections, and global styles that are imported into a barebones, Elementor-compatible theme (like the "Hello Elementor" theme).
The Pros:
- Lightweight Base: You start with a minimal theme, avoiding the feature bloat common in all-in-one themes.
- Total Design Control: Every element, from the header to the footer, is an editable Elementor template. This provides granular control that's often locked away in a theme's code.
- Modularity: You can pick and choose which templates to use. Don't like the "About" page? You're not stuck with it; just build a new one using the kit's global styles.
The Cons:
- Dependency Lock-in: You are fully committed to the Elementor ecosystem. Specifically, this kit requires Elementor Pro. If you or your client ever decide to move away from Elementor, you're looking at a complete site rebuild.
- Potential for Inconsistency: If not managed properly, it's easy for a client (or a junior developer) to go rogue, breaking the global styles and creating a visually inconsistent mess. Strong governance of the Elementor settings is key.
Part 2: The Build Site – A Meticulous Installation Guide
This is where the theory ends and the practical application begins. A smooth installation process is the first sign of a well-made kit. A bumpy one is a major red flag. Follow these steps precisely to avoid common frustrations.
Step 0: The Groundwork (Prerequisites)
Do not skip this. A clean environment is non-negotiable for a predictable outcome.
- A Clean WordPress Install: I cannot stress this enough. Do not attempt to install this on an existing site cluttered with old plugins and content. Start with a fresh WordPress installation on a reliable host.
- Server Environment Check: Elementor, especially with a full kit import, can be resource-intensive. Ensure your hosting environment meets these minimums, and preferably exceeds them:
- PHP 7.4 or higher (PHP 8.x is recommended).
- MySQL 5.6 or higher.
- WordPress Memory Limit:
WP_MEMORY_LIMITof 256M or more. You may need to edit yourwp-config.phpfile to set this.
- Required Plugins: Install and activate these plugins before you attempt to import the kit.
- Elementor (Free): The core page builder, available from the WordPress repository.
- Elementor Pro: This is mandatory. Template kits rely on Pro features like the Theme Builder (for headers/footers), custom fonts, and global styles. Without it, the kit is fundamentally broken.
- Template Kit - Import: A specific plugin, usually by Envato, is the standard tool for this job. Navigate to "Plugins > Add New" and search for it.
- Base Theme: Install and activate the "Hello Elementor" theme. It's a featherlight, blank-canvas theme designed specifically for Elementor Theme Builder. Using another theme can introduce conflicting styles and scripts.
Step 1: The Import Process
With the foundation laid, we can proceed with the import. You should have downloaded the Interrial kit's main ZIP file from your source.
- Navigate to Tools > Template Kit in your WordPress dashboard. This menu item appears after you install the "Template Kit - Import" plugin.
- You'll see an upload area. Click the "Upload Template Kit ZIP File" button and select the Interrial ZIP file you downloaded. Do not unzip the file first. You upload the entire package.
- The importer will process the ZIP and display a manifest of all the templates included in the kit (e.g., Homepage, Header, Footer, Single Post, etc.). It will also show you if you have all the required plugins installed. If you see any red warnings here, stop and resolve them.
- CRITICAL STEP: Global Kit Styles. You will see a button to "Import Global Kit Styles". This is the first thing you must do. This import sets up the global color palette, typography settings, and default layout configurations for the entire site. Importing page templates before the global styles will result in them looking broken and unstyled.
- Import Templates: Once the global styles are in, you can import the other templates. You can import them one by one or use the "Import All Templates" button. I recommend importing them selectively, starting with the core components:
- Header
- Footer
- Homepage
- About
- Services
- Contact
Step 2: Common Pitfalls and Troubleshooting
This is where many DIY attempts fail. Here are the common errors and their solutions.
Error: "Sorry, this file type is not permitted for security reasons."
This is a common WordPress security feature preventing the upload of potentially unsafe file types (like SVGs), which are often included in kits. To resolve this temporarily:
- Connect to your site via FTP or your hosting file manager.
- Open your
wp-config.phpfile. - Add the following line just before the
/* That's all, stop editing! */line:define('ALLOW_UNFILTERED_UPLOADS', true); - Save the file. Try the upload again.
- Security Warning: It is highly recommended to remove this line of code after you have successfully imported the kit, as it lowers your site's security posture.
Error: Server Timeouts or 500 Errors During Import
This is almost always a server resource issue. The import process is trying to do too much work for the server's allocated resources.
- Solution 1 (Memory Limit): Ensure your
WP_MEMORY_LIMITis set to 256M or higher. - Solution 2 (Execution Time): Contact your host and ask them to increase the
max_execution_timeandmax_input_timefor your PHP environment to at least 300 seconds. - Solution 3 (Manual Import): If the bulk importer fails, import the templates one by one. This is slower but puts less strain on the server with each request.
Step 3: Post-Import Assembly
Importing the templates doesn't automatically build the site. You've loaded the blueprints; now you have to assemble the structure.
- Set Up the Header and Footer:
- Go to Templates > Theme Builder.
- In the "Header" section, click "Add New". You will see your imported "Interrial Header" template.
- Click "Edit" on the template. Make any changes you need (like updating the logo). Click "Publish".
- Elementor will ask you for "Display Conditions". Click "Add Condition" and set it to "Entire Site". Save & Close.
- Repeat this exact process for the Footer template.
- Assign the Homepage:
- Go to Settings > Reading in the WordPress dashboard.
- Under "Your homepage displays", select "A static page".
- For the "Homepage" dropdown, select the "Home" page that was created by the template import.
- Save your changes.
After these steps, your site should now have the Interrial header, footer, and homepage active. You can now go through the other pages (About, Services, etc.) and begin replacing the placeholder content with your client's actual text and images.
Part 3: The Post-Build Inspection – Is it Coded Well?
A kit can look great on the surface but be a nightmare to customize. A post-installation review reveals its true quality.
Global Styling Implementation
This is the single most important factor for me. I immediately opened the Site Settings in Elementor (Hamburger Menu > Site Settings). I was pleased to find that the Interrial kit makes proper use of Global Colors and Global Fonts. The primary, secondary, text, and accent colors were all defined. The typography for H1, H2, body text, etc., was also set globally.
Why this matters: This is the mark of a professionally built kit. It means if the client decides they want a different primary color or body font, you can change it in one place, and the change will propagate across the entire website. Kits that hard-code colors and fonts into individual widgets are an absolute maintenance disaster and should be avoided.
Responsiveness and Mobile Experience
Out of the box, Interrial's responsiveness is decent but not perfect. The layouts scale down correctly for tablet and mobile viewports without major breaking issues. The navigation collapses into a standard mobile menu, and columns stack as expected.
However, I did notice some areas that require manual tweaking. On some sections, the mobile typography felt a bit too large, and padding was excessive, leading to unnecessary scrolling. This is a common issue and is easily fixed within Elementor's responsive editing mode. A developer should plan to spend an hour or two fine-tuning the mobile and tablet views for a truly polished result. It's not a "set it and forget it" solution, but it provides a solid 90% solution that you can then perfect.
Widget and Plugin Dependencies
The kit sticks to native Elementor and Elementor Pro widgets. This is a huge plus. It doesn't require a dozen third-party "Essential Addons" or "Premium Widgets" plugins, which can introduce security vulnerabilities, performance issues, and licensing headaches. By keeping the dependencies lean (just Elementor and Elementor Pro), the kit ensures better long-term stability and easier maintenance.
Part 4: Performance and Final Verdict
Elementor sites have a reputation for being slow if not built with care. The template kit itself isn't inherently slow, but the combination of Elementor Pro, high-resolution images, and a lack of optimization will absolutely result in poor performance.
The Interrial kit itself is reasonably well-structured. It doesn't use excessive animations or overly complex DOM structures. The main performance drag will come from the placeholder images, which are often large. The first step after customization must be a thorough optimization pass: compress all images (using a plugin like ShortPixel or Imagify), implement a robust caching solution (like WP Rocket or LiteSpeed Cache), and consider a CDN for a global audience.
The Final Assessment: Who is Interrial For?
Interrial is not for the developer looking to build a groundbreaking, award-winning website from scratch. It is also not for the complete beginner who expects a one-click solution that reads their mind.
This kit is ideal for:
- Freelance Developers and Small Agencies: It is a powerful accelerator. It allows you to deliver a professional, visually appealing website for an interior design client in a fraction of the time it would take to build from the ground up. It handles the foundational design, letting you focus on customization, content, and optimization.
- DIY Business Owners with Technical Acumen: An interior designer who is comfortable with WordPress and Elementor can use this kit to build their own site, provided they are willing to follow the installation steps carefully and learn the basics of the Elementor Theme Builder.
The value proposition, especially when sourced from a GPL club like gplpal, is extremely high. It provides the structural and stylistic bones of a project that would otherwise cost thousands in design fees alone. It's a starting point, a robust framework that, in the hands of a competent developer, can be quickly transformed into a site that looks and feels entirely custom. For those building multiple sites, browsing a large collection of Free download WordPress themes and kits can provide an incredible return on investment. Ultimately, Interrial delivers on its promise: it's a solid, professional, and highly efficient tool for building elegant websites for design-focused clients.