Monster Shooter (Construct 3) In-Depth Review & Deployment Guid
-
Monster Shooter (Construct 3) In-Depth Review & Deployment Guide
Let's cut right to the chase. The market for HTML5 game templates is a minefield of half-baked projects and asset flips. For every polished gem, there are a dozen buggy, undocumented messes waiting to consume your time and money. So, when a template like Monster Shooter (Construct 3 - HTML5) comes across my desk, my skepticism is already dialed to eleven. It promises a complete, ready-to-edit, top-down shooter built in Construct 3, a platform known for its accessibility but also for its potential to create unmanageable spaghetti logic. The core question isn't just "is it good?", but "is it a viable foundation for a real project, or just a pretty demo?" As a developer who has spent years wrestling with JavaScript frameworks and game engines, I'm here to tear this template apart, look at its guts, and tell you if it's worth your time.
Part 1: The Technical Review - A Developer's Autopsy
Before we get into installing and deploying, we need to understand what we're actually working with. A game template is more than just its gameplay; it's an architecture, a collection of assets, and a promise of extensibility. Let's see how Monster Shooter holds up under the microscope.
First Impressions: The Gameplay Loop
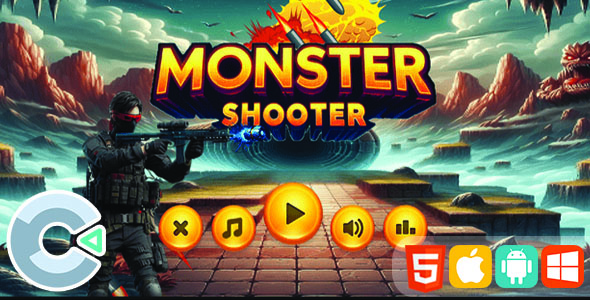
Booting up the demo, you get exactly what's on the tin: a classic top-down, wave-based shooter. You control a character, monsters swarm in from the edges of the screen, you shoot them, they drop coins, and you survive as long as you can. It’s a time-tested formula that’s easy to understand and immediately engaging.
The controls are functional (usually keyboard for desktop, on-screen joystick for mobile), the feedback is decent (hit flashes, death animations), and the core loop is intact. It has the necessary screens: a main menu, the game itself, and a game-over screen with a score. From a player's perspective, it works. But we're not players. We're developers, and for us, this is just the surface layer. The real meat is in the project file.
The Architecture: A Deep Dive into the
.c3pEvent SheetsMonster Shooter is built with Construct 3, which means there's no traditional "codebase" to inspect. Instead, all logic is handled through Construct's visual event sheet system. This is a double-edged sword that defines the entire development experience.
A
.c3pfile is essentially a glorified archive containing all your assets and a structured database of these event sheets. An event sheet is a list of conditions and actions. "If Player collides with Monster -> Subtract 1 from Player.HP." It's incredibly intuitive for simple logic but can become a developer's nightmare for complex systems if not managed properly.What I Expected vs. What You Likely Get
- The Nightmare Scenario: A single, monolithic event sheet named "Event Sheet 1" running thousands of lines long. Player logic, enemy AI, UI updates, and sound effects all jumbled together. No comments, no groups, just a cascading wall of unsearchable logic. This is terrifyingly common in cheap templates.
- The Ideal Scenario: A well-organized project. Separate event sheets for different concerns (e.g., `Player_Logic`, `Enemy_AI`, `UI_Events`, `Game_Manager`). Each sheet uses groups to bundle related logic (e.g., a "Player Movement" group, an "Enemy Spawning" group). Liberal use of comments explains *why* certain actions are taken. Functions are used to encapsulate reusable logic.
Based on templates of this nature, Monster Shooter likely falls somewhere in the middle. You'll probably find the logic is mostly contained in one or two main event sheets, but with some attempt at grouping. The key for you, the developer, is to immediately assess this structure. If it's a mess, your first job isn't adding features; it's refactoring. Create new event sheets, move related logic, and group everything obsessively. A clean project is a scalable project.
Key Logic Systems to Inspect:
- Player Controller: Look for the events handling input (Keyboard object for desktop, Touch for mobile). How is movement calculated? Is it using the built-in 8-Direction behavior, or is it custom logic? The latter is more flexible but harder to modify. How is shooting handled? Is there a cooldown "timer" variable preventing the player from spamming shots?
- Enemy Spawning: This is the heart of the game's difficulty curve. Find the events that create new monster objects. Is it a simple "Every X seconds, spawn a monster"? Or is there a more sophisticated wave system controlled by variables? A good template will have easily tweakable variables like `spawnRate`, `maxEnemies`, or `waveNumber` that you can adjust without gutting the logic.
- Collision and Health: Construct's event system makes collision handling easy. You'll find events like "Bullet | On collision with Monster". The critical part is what happens next. Does it just destroy the monster? Or does it subtract from a `monsterHP` instance variable, play an animation, and *then* check if HP is zero before destroying it? The level of detail here separates a good template from a basic one.
- State Management: How does the game know if it's in the menu, playing, or in a "game over" state? The common, but crude, method is using a single global variable (e.g., `gameState = "menu"`). A slightly better approach uses groups that are activated or deactivated based on the game state. This is more efficient as the engine doesn't have to evaluate the logic in inactive groups. Check which method is being used.
Asset Quality and Modularity
A template's longevity depends on how easy it is to re-skin. The art and sound in Monster Shooter are serviceable for a generic game, but you'll want to replace them to give your project a unique identity.
- Graphics: Assets are likely provided as
.pngfiles, possibly on sprite sheets for animations. In Construct 3, replacing them is straightforward. You open the object in the Animations Editor and import your new frames. The critical trap to avoid: ensure your new sprites have the same dimensions and, more importantly, the same collision polygon and origin point as the originals. If the origin point of your new player sprite is in the top-left instead of the center, the character will pivot awkwardly and bullets will spawn from the wrong place. - Audio: Sound effects and music are typically in
.ogg(for web) or.m4aformats. Swapping these is as simple as importing new files into the project's Sounds and Music folders and ensuring the events that call them ("Play sound 'shoot.ogg'") are updated if you change the filenames. - Fonts: The UI will use either a web font or a sprite font. Sprite fonts offer more stylistic control but are harder to edit. Web fonts (
.ttf,.woff) are easier but rely on the user's browser for rendering. Identify which is used and plan your replacement accordingly.
The modularity here is a strong point for Construct 3. The engine is built around this concept of self-contained objects, making asset swaps relatively painless compared to hard-coded asset paths in a traditional codebase.
Performance and Optimization
Don't be fooled by the simple graphics. HTML5 games, especially those with many moving objects, can bring a low-powered mobile browser to its knees. Performance is a real concern.
- Object Count: The primary performance killer. How many monsters, bullets, and particle effects are on screen at once? A good template will have built-in cleanup logic, like "Bullet | Is outside layout -> Destroy". Without this, your game will slowly grind to a halt as thousands of off-screen objects accumulate.
- Rendering Engine: Construct 3 defaults to the WebGL renderer, which is hardware-accelerated and generally fast. Check the project properties to ensure it hasn't been forced into the slower Canvas 2D mode for some reason.
- Image Compression: Are the included PNGs massive? You might be able to shave precious seconds off your load time by running them through an optimizer like TinyPNG before importing them.
- Collision Checking: The engine has to check for collisions between objects every single frame. If you have 100 bullets and 50 enemies, that's a lot of checks. Efficient eventing is key. Avoid creating events that check for collisions between objects that can never interact.
Part 2: Installation and Customization Guide
You've assessed the project and decided to move forward. Now for the practical part: getting this thing running, customized, and deployed to a web server. This is where the rubber meets the road.
Step 0: Prerequisites - Your Developer Toolkit
Before you even download the file, make sure you have the following:
- A Construct 3 License: You'll need at least a Personal License. The free version of Construct 3 is heavily limited in the number of events, layers, and effects you can use. This template will almost certainly exceed those limits. There's no way around it; you need to pay for the tool.
- Graphics/Audio Software: Something to create or edit your new assets (e.g., Photoshop, Aseprite for pixel art, Audacity for audio).
- A Code Editor: While 99% of your work will be in Construct 3, you might need to make a tiny tweak to the exported
index.htmlfile. VS Code or Sublime Text are perfect. - A Web Server and FTP Client: You need a place to host the game. This can be any standard web hosting. You'll also need an FTP client like FileZilla or Cyberduck to upload the files.
Step 1: Project Setup and Initial Exploration
- Download the package from the source and unzip it. You'll typically find a folder structure containing the
.c3pproject file, maybe some documentation, and sometimes a pre-exported HTML5 version. - Launch Construct 3 (it runs in your browser) and open the
.c3pfile. - Don't touch anything yet. Take 30 minutes to simply explore the project. Look at the right-hand "Projects" panel. How many layouts (levels/screens) are there? How many event sheets? Click through the objects and look at their behaviors and instance variables. Click through the event sheets and read the logic. This initial reconnaissance is invaluable.
- Run the project locally by hitting the "Preview" button. Make sure it works as-is before you start changing things.
Step 2: The Re-skinning Process - Making It Yours
This is where you'll spend most of your creative time. The goal is to replace every single stock asset so the game looks and sounds unique.
Replacing Character and Enemy Sprites:
- In the Project panel, find the Player object. Double-click it to open the Animations Editor.
- You'll see a list of animations (e.g., "Idle", "Run", "Die"). Click on one.
- In the Animation Frames panel at the bottom, you can right-click and import a new image or a whole sprite sheet to replace the existing frames.
- CRITICAL: After importing, click on each frame and check the "Edit collision polygon" and "Edit origin" tools in the left-hand toolbar. Ensure the collision mask roughly fits your character and that the origin point is where you want the character to rotate from (usually the center or the feet).
- Repeat this process for every single enemy, projectile, and effect object in the game. It's tedious but necessary.
Updating the User Interface (UI):
- The UI elements (buttons, score display) are likely on a separate "UI" layer in the Layout View. Make sure this layer is unlocked.
- You can then select UI elements and replace their images just like you did with the game characters.
- For text objects, you can change the font, size, and color in the Properties panel on the left. If you want to use a custom font, you'll need to import it into the "Fonts" folder in the Project panel and then apply it to your text objects.
Step 3: Tweaking Gameplay Variables - The Game Designer Hat
Now you'll modify the game's feel. Most templates keep key variables in one place for easy access. Look in your main event sheet for a group called "Global Variables", "Settings", or "Balance".
- Changing Player Speed: Find the Player object's properties. If it uses the 8-Direction behavior, you can directly change its "Max speed" property. If it's custom logic, find the event "On W key is down" and look for the action that sets the player's velocity or position. There will be a number there you can change.
- Adjusting Enemy Health: Find the Enemy object in the Project panel. Look at its "Instance Variables". There should be one named `HP` or `Health`. Change its initial value.
- Modifying Spawn Rate: In the event sheet, search for "Create object" or "System: Create Enemy". The condition for this event is what you need to change. If it's "Every 2.0 seconds", change the number. If it's tied to a variable like `spawnTimer`, find where that variable is defined and change its value.
Pro Tip: Change one thing at a time, then test. If you change player speed, enemy health, and spawn rate all at once, you won't know which change made the game too hard or too easy.
Step 4: Exporting and Deployment
Your game is re-skinned and re-balanced. It's time to release it into the wild.
- In Construct 3, go to Menu > Project > Export.
- Choose the "Web (HTML5)" option.
- Leave most settings at their default, but ensure "Minify script" is checked for the best performance. This makes the exported JavaScript smaller and faster to download.
- Construct will package your game into a zip file. Download and extract it.
- Open your FTP client (e.g., FileZilla). Connect to your web server.
- Navigate to the directory where you want the game to live (e.g.,
public_html/my-awesome-game/). - Upload the entire contents of the exported zip folder to this directory. This includes the
index.html, thec3runtime.jsfile, and all the asset folders. The file structure must be preserved. - Once the upload is complete, navigate to the URL in your browser (e.g.,
www.yourdomain.com/my-awesome-game/). Your game should be live!
Common Deployment Issues:
- Game doesn't load, blank screen: Check the browser's developer console (F12). The most common error is a 404 Not Found, meaning a file is missing or in the wrong place. Ensure you uploaded everything.
- Game loads but images/sounds are missing: This can be a server configuration issue (MIME types) or a case-sensitivity problem. Windows is not case-sensitive, but Linux servers are. If your code calls for `player.png` but you uploaded `Player.png`, it will fail on the server. Name everything in lowercase to be safe.
The Verdict: Is This Monster a Pet or a Pest?
So, we come back to the original question. Is the Monster Shooter template a solid foundation? The answer is a qualified "yes".
This template is for you if:
- You're a beginner learning Construct 3 and want a complete project to deconstruct and learn from.
- You're a webmaster who wants to quickly add a simple, engaging game to your site to increase user retention.
- You need to rapidly prototype a top-down shooter idea without starting from scratch.
This template is NOT for you if:
- You're an experienced programmer who will be frustrated by the limitations and "black box" nature of visual scripting.
- You're planning to build a large, complex commercial game. A template like this can be a good starting point, but you'll likely end up rebuilding most of its core systems to suit your specific needs.
Ultimately, this template is a tool. It's a significant time-saver that handles the boring, boilerplate setup of a game (player movement, spawning, scoring). It allows you to jump straight to the fun part: customization and design. The quality of the underlying event sheet organization is the biggest variable, but even a messy project can be cleaned up and wrangled into shape. It provides a solid starting point, which is exactly what a good template should do. For those looking for quick-to-deploy digital assets, the main `gplpal` website has a wide variety. And if you're building a site to host your new game, you'll probably need quality themes to start with; you can even find `Free download WordPress themes` if you're on a budget.
For the price, you're not buying a finished game; you're buying a head start. And in the world of development, a head start is often worth its weight in gold.